This post contains affiliate links. If you purchase through these links, I may earn a small commission at no extra cost to you. Thank you for supporting my blog!
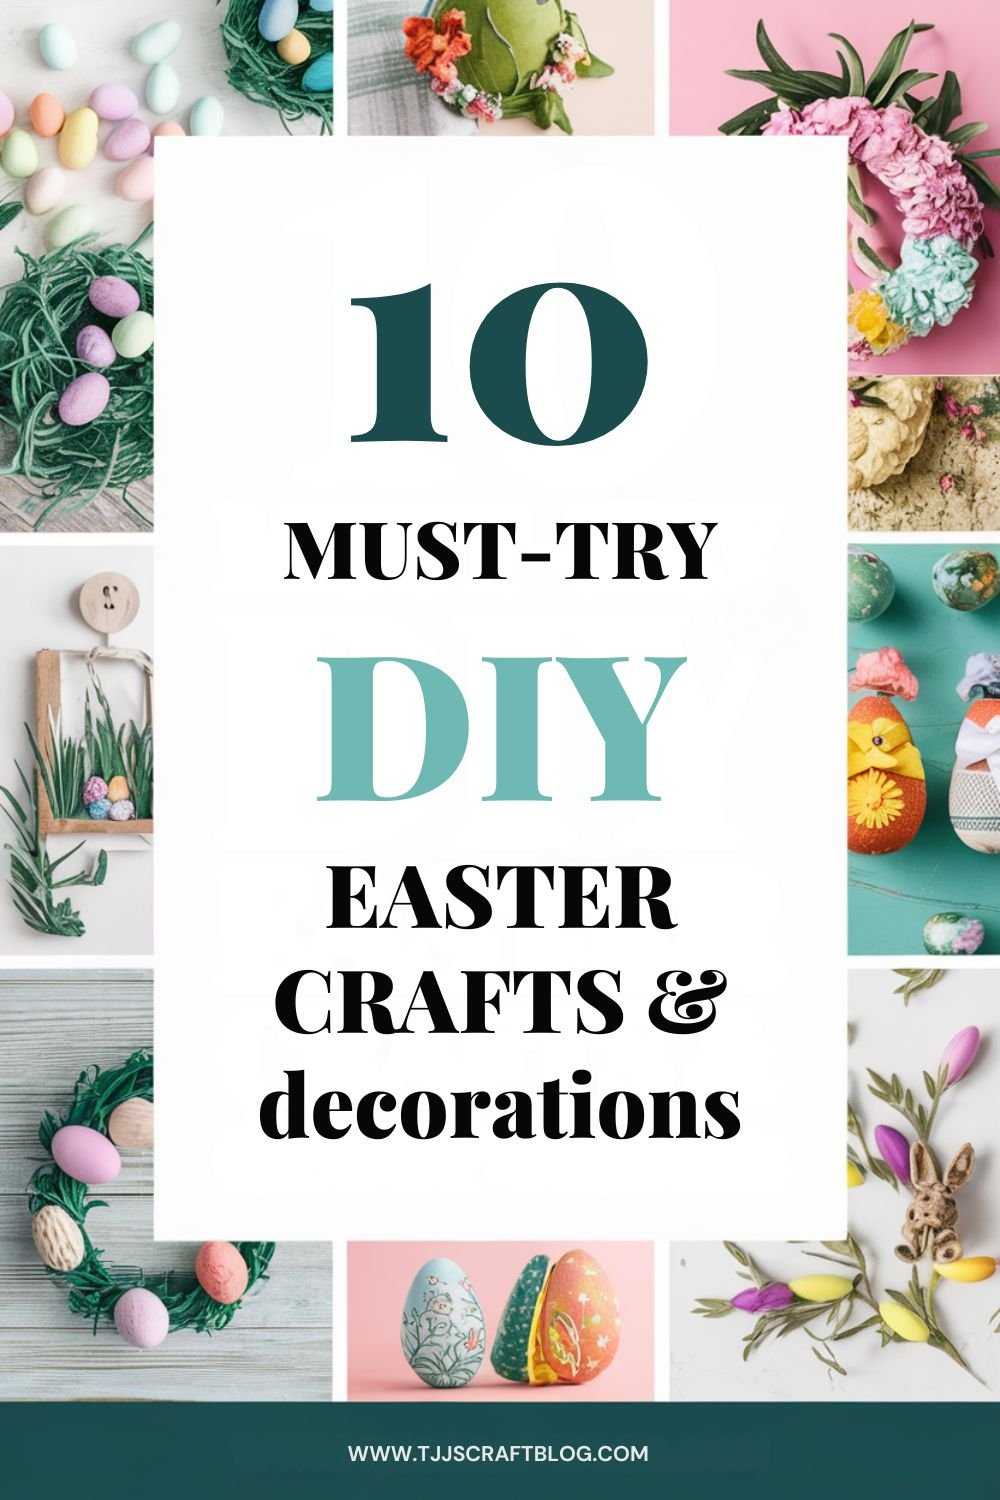
Easter is a time of renewal, joy, and creativity, making it the perfect occasion to engage in DIY projects that bring the whole family together. As the flowers bloom and the days grow longer, crafting enhances the festive spirit, allowing you to create beautiful decorations that celebrate the season. Whether you’re looking to add a personal touch to your home or create lasting memories with loved ones, these DIY Easter crafts are sure to inspire.
From colorful egg decorating to whimsical bunny-themed wreaths, each project offers a unique way to express your creativity while embracing the joy of Easter. Not only do these crafts brighten up your home, but they also provide fun, family-friendly activities that everyone can enjoy. So, gather your supplies and let’s hop into these delightful DIY Easter crafts that will make your home festive and inviting!
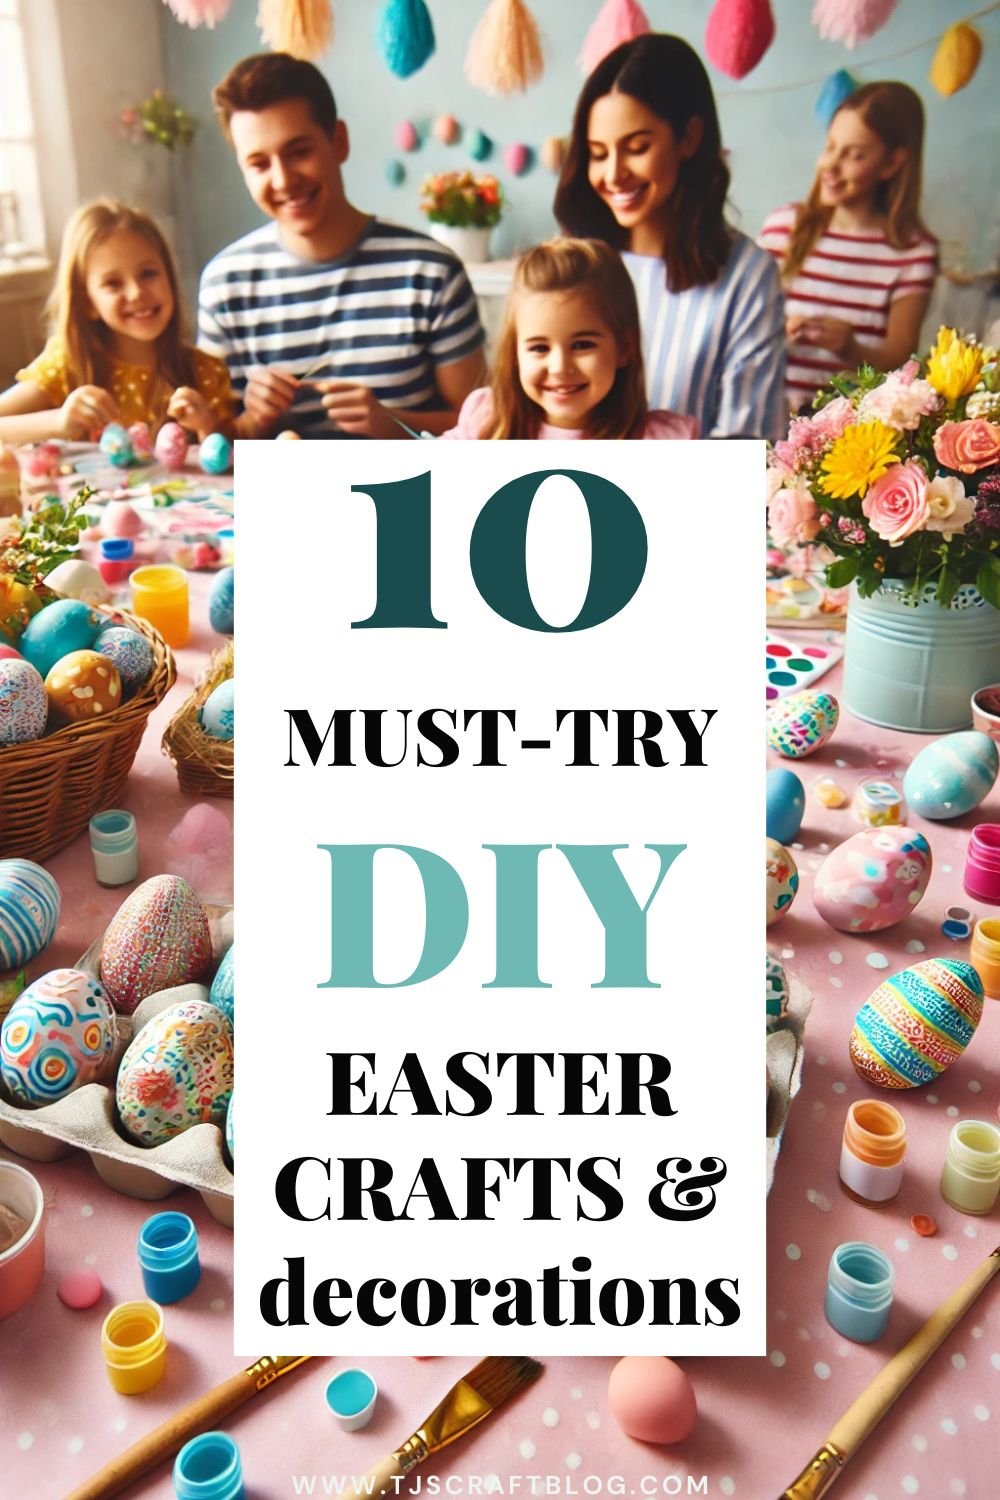
1. Colorful Easter Egg Decorating
Materials Needed:
- Hard-boiled eggs
- Food coloring or egg dye kits
- Paintbrushes
- Stickers, washi tape, glitter
- Rubber bands (for tie-dye effect)
- Vinegar
- Paper towels
- Bowls or cups for dyeing
- Plastic spoons or tongs
- Wax crayons (for resist dyeing)
- Mod Podge (for decoupage)
- Tissue paper or napkins with patterns (for decoupage)
How to Create:
- Prepare the Eggs: Start by hard-boiling your eggs and letting them cool completely. This will prevent them from cracking during the dyeing process.
- Dyeing Techniques:
- Classic Dip-Dye: Prepare your dye according to the package instructions, usually adding vinegar to help the color adhere. Dip the eggs in the dye for a few seconds to achieve a light color, or leave them in longer for a deeper shade.
- Tie-Dye: Wrap rubber bands around the eggs in various patterns before dyeing. The areas covered by the rubber bands will remain white, creating a tie-dye effect.
- Ombre: Dip the egg in one color and gradually submerge more of the egg to create a gradient effect.
- Marbling: Swirl different colors of dye in a bowl of water and gently roll the egg in the mixture to create a marbled effect.
- Resist Dyeing: Draw designs on the eggs with wax crayons before dyeing. The wax will resist the dye, leaving the designs visible.
- Decoupage: Apply Mod Podge to the egg and carefully place pieces of tissue paper or patterned napkins on top. Smooth out any wrinkles and apply another layer of Mod Podge to seal.
- Drying: Once the eggs are dyed, gently pat them dry with paper towels and let them air dry completely before handling.
- Decorative Touches: Use paintbrushes to add details, designs, or patterns. Apply stickers, washi tape, or glitter for extra sparkle and personalization.
Idea Deep Dive:
Decorating Easter eggs is a cherished tradition that brings families together and sparks creativity. It’s an opportunity to experiment with colors, patterns, and techniques. Encourage children to explore different dyeing methods and express their artistic flair.
- Color Mixing: Experiment with mixing different food coloring colors to create unique shades.
- Natural Dyes: For a natural alternative, try using ingredients like onion skins, beets, or red cabbage to create dyes.
- Mess-Free Dyeing: Use muffin tins or egg cartons to hold the dye and prevent spills.
- Display Ideas: Showcase your decorated eggs in a basket, bowl, or on a decorative plate for a festive Easter centerpiece.
- Beyond Decorating: Use the decorated eggs for an Easter egg hunt, or incorporate them into Easter crafts and games.
Remember that Easter egg decorating is not just about the end result but also about the joy of the process and the memories created along the way. Embrace the mess, the laughter, and the creativity, and enjoy this special Easter tradition with your loved ones.outcome.
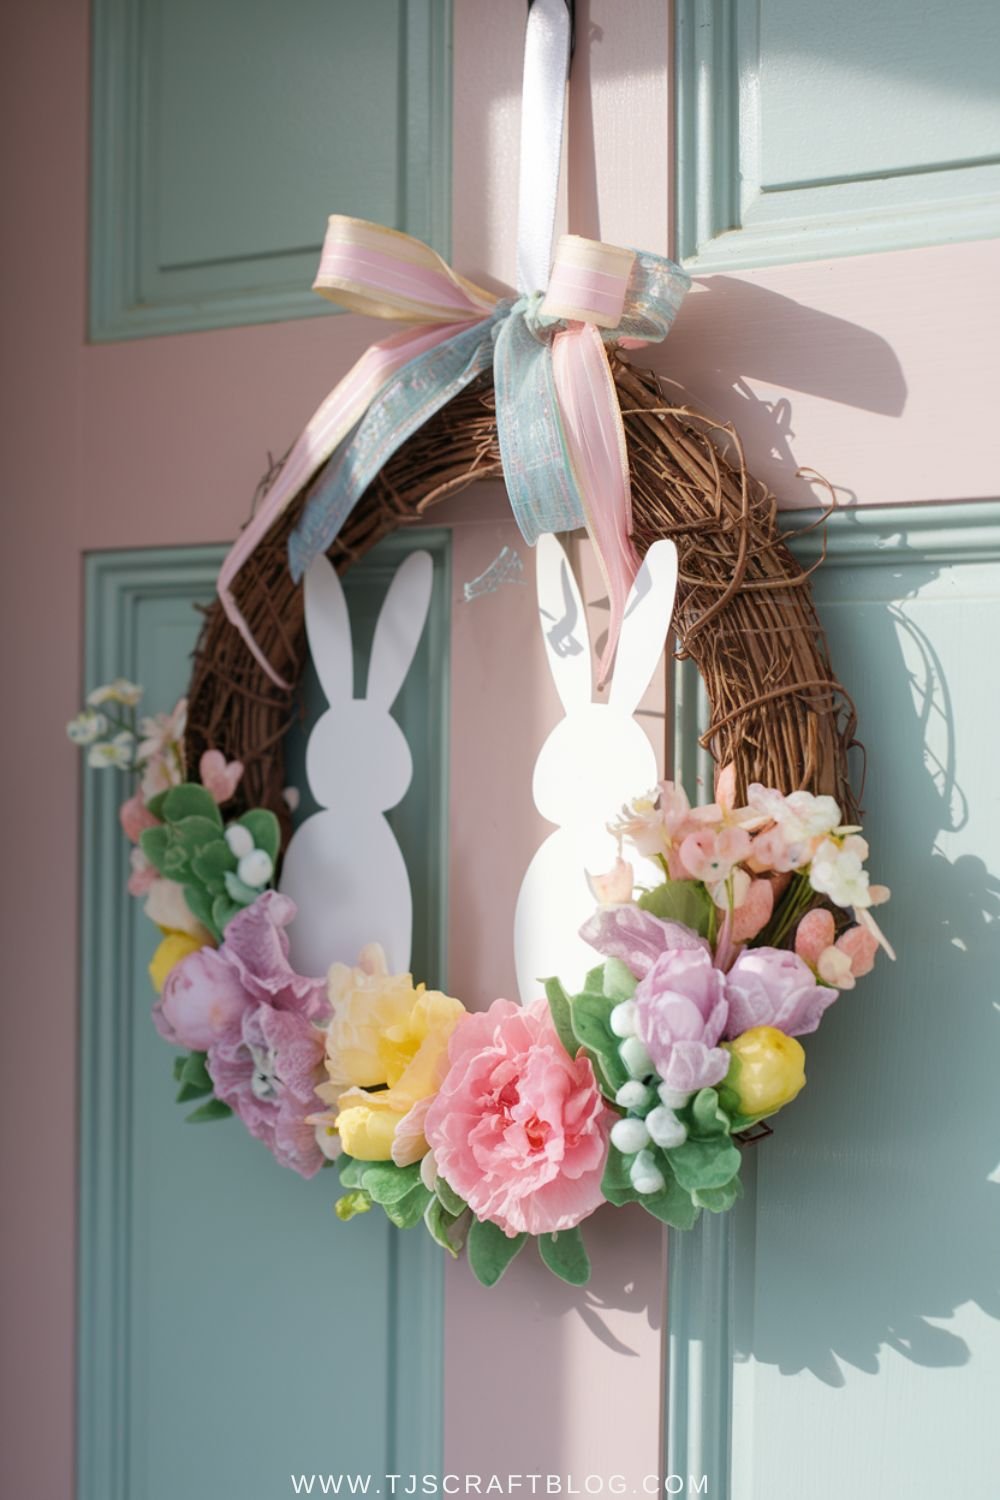
2. Bunny-Themed Wreath
Materials Needed:
- Faux flowers: Choose a variety of faux flowers in pastel colors like pink, lavender, yellow, and light blue. You can use a single type of flower or mix and match for a more diverse look.
- Bunny cutouts: You can either purchase pre-cut bunny shapes or create your own using cardstock or felt. If you’re making your own, use a stencil or freehand draw the bunny shapes.
- Pastel ribbons: Select ribbons in coordinating pastel colors to match your flowers. Satin, grosgrain, or wired ribbons all work well for this project.
- Wreath base: Choose a wreath base made of foam or wire. The size of the base will depend on your desired wreath size.
- Hot glue gun and glue sticks: A hot glue gun is essential for attaching the flowers, bunnies, and ribbons to the wreath base.
How to Create:
- Prepare your workspace: Cover your work surface with newspaper or a drop cloth to protect it from hot glue. Plug in your hot glue gun and allow it to heat up.
- Attach the flowers: Begin by attaching the faux flowers to the wreath base using the hot glue gun. Place a small amount of hot glue on the stem of each flower and press it firmly onto the base. Space the flowers evenly around the wreath for a balanced look. You can create a full, dense wreath or a more sparse design, depending on your preference.
- Add the bunny cutouts: Once the flowers are in place, add the bunny cutouts. Apply hot glue to the back of each bunny and attach it to the wreath. You can place the bunnies among the flowers or create a focal point by clustering them together.
- Tie and attach the ribbons: Cut the pastel ribbons into desired lengths and tie them into bows. Use the hot glue gun to attach the bows to the bottom of the wreath. You can also add additional ribbon accents by weaving them through the flowers or around the wreath base.
- Finishing touches: Once all the elements are in place, step back and take a look at your wreath. Make any adjustments as needed. You can add additional embellishments like small Easter eggs, chicks, or butterflies.
Idea Deep Dive:
- Color palette: Customize your wreath by choosing a specific color palette. You can go with a traditional pastel palette or try a more modern approach with bright, bold colors.
- Materials: Experiment with different materials to create a unique wreath. Instead of faux flowers, you could use fabric flowers, paper flowers, or even dried flowers.
- Embellishments: Get creative with embellishments! You can add small bird nests, feathers, or moss for a natural touch.
- Personalization: Personalize your wreath by adding a monogram or a special message.
- Placement: Hang your wreath on your front door, a wall, or a window to add a festive touch to your home.
Safety Tips:
- Hot glue gun safety: Always handle the hot glue gun with care. The glue and gun tip can get very hot and cause burns. Keep the glue gun out of reach of children and pets.
- Ventilation: Work in a well-ventilated area when using hot glue.
Remember to have fun and get creative with your Easter wreath!
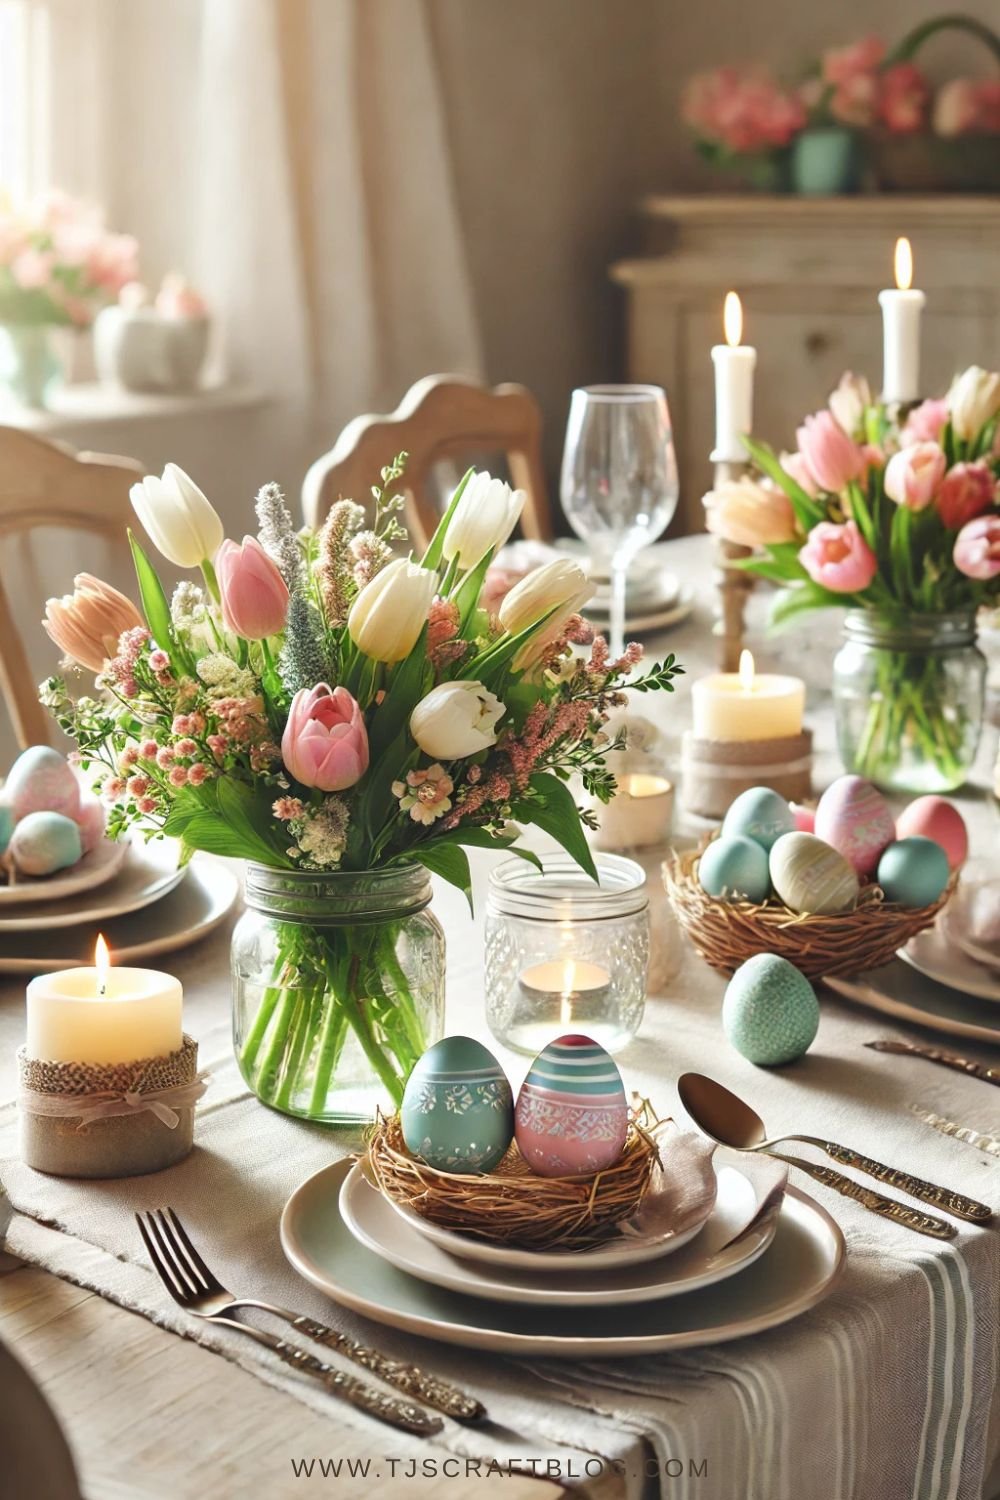
3. DIY Easter Centerpieces
Materials Needed:
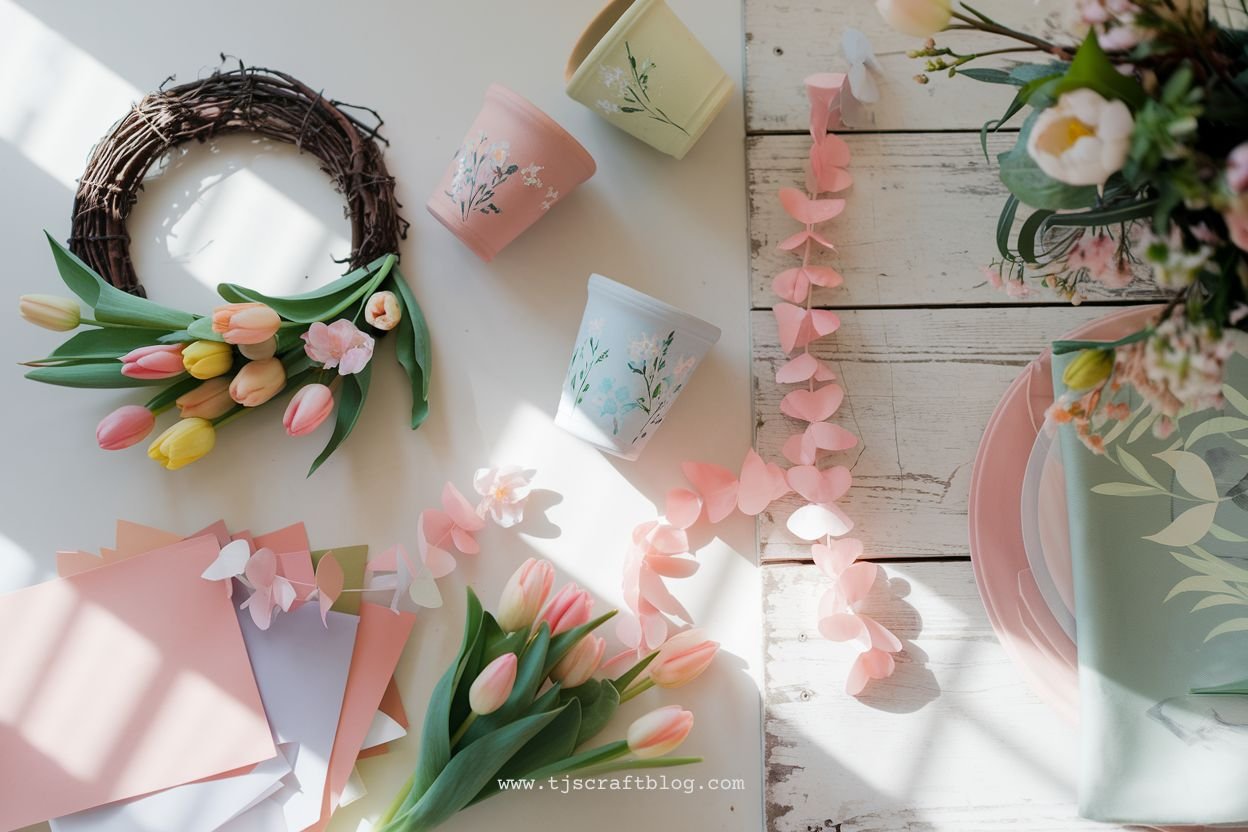
- Fresh Flowers: Choose spring blooms like tulips, daffodils, lilies, or hyacinths. Select a variety of colors and sizes to create a vibrant display.
- Decorative Eggs: Use plastic eggs for durability or paint real eggshells with intricate designs. Consider dyeing eggs with natural dyes for a rustic look. You can also find decorative eggs made from wood, ceramic, or other materials.
- Mason Jars or Vases: Choose clear glass jars or vases in various sizes to hold your floral arrangements. You can also use repurposed containers like milk bottles, teacups, or pitchers.
- Floral Foam: This is optional but can help keep your flowers in place and extend their freshness. Soak the foam in water before using it.
- Water: Use clean water to fill your jars or vases and keep your flowers hydrated.
- Scissors or Pruning Shears: Use these to trim the stems of your flowers to the desired length.
How to Create:
- Prepare Your Flowers: Trim the stems of your flowers at an angle to allow for better water absorption. Remove any leaves that would be submerged in water.
- Prepare Your Container: If using floral foam, soak it in water and place it in the bottom of your jar or vase.
- Arrange Your Flowers: Start by adding your largest flowers or greenery to create a base for your arrangement. Then, add smaller flowers and fillers to fill in the gaps. Vary the heights and colors of your flowers for a dynamic look.
- Add Decorative Eggs: Nestle decorative eggs among the flowers. You can place them in the center of the arrangement, tuck them between blooms, or even hang them from the stems of your flowers.
- Add Water: Fill your jar or vase with water, making sure the stems of your flowers are submerged. If using floral foam, add water regularly to keep it moist.
Idea Deep Dive:
- Color Schemes: Choose a color scheme that complements your Easter decor. You can go for a classic pastel palette, a vibrant rainbow of colors, or a more sophisticated monochromatic look.
- Egg Decorating: Get creative with your egg decorating. You can paint them with traditional Easter motifs like bunnies and chicks, or try something more modern like geometric patterns or abstract designs.
- Container Variations: Don’t be afraid to experiment with different types of containers. You can use vintage jars, colorful vases, or even repurposed household items like watering cans or teapots.
- Greenery: Add some greenery to your arrangement for texture and visual interest. You can use ferns, eucalyptus leaves, or even sprigs of herbs.
- Fragrance: Choose flowers with a light fragrance to add a subtle scent to your home.
- Maintenance: Change the water in your arrangement every few days and trim the stems of your flowers as needed. This will help keep your flowers fresh and vibrant.
- Additional Decor: Consider adding other decorative elements to your arrangement, such as ribbons, bows, or small figurines.
By following these tips, you can create beautiful and festive Easter floral arrangements that will brighten up your home and add a touch of spring cheer.
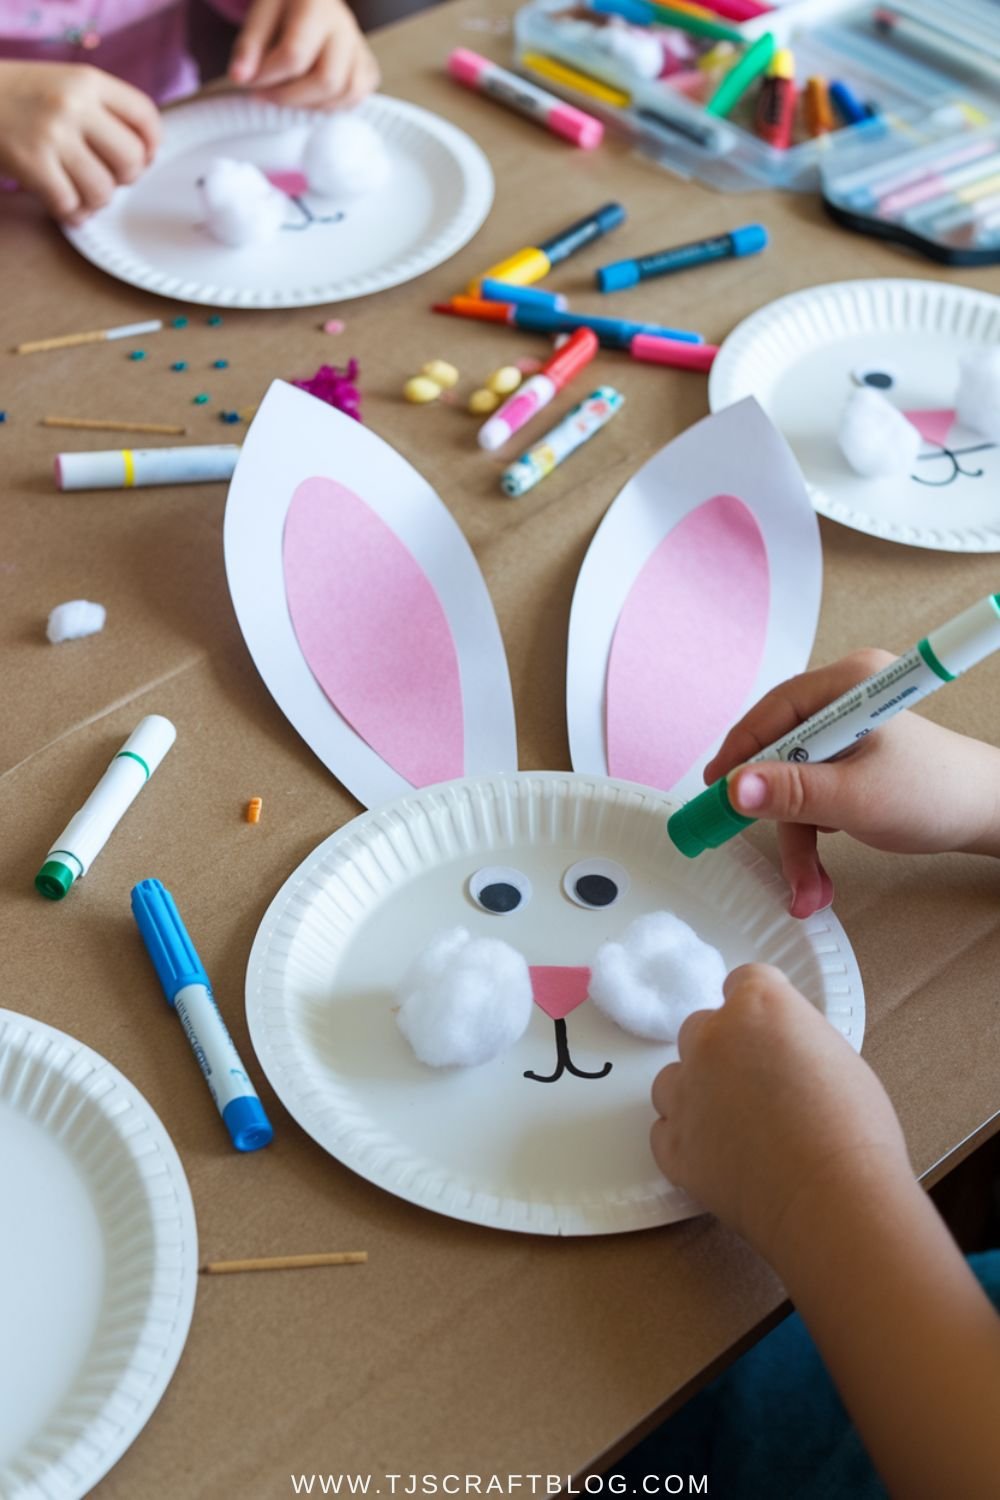
4. Paper Plate Easter Bunny
Materials Needed:
- Paper plates (standard size)
- Cotton balls
- Construction paper (various colors)
- Markers (washable, non-toxic)
- Glue (safe for children)
- Scissors (child-safe)
- Googly eyes (assorted sizes)
- Pipe cleaners (optional, for whiskers)
- Ribbon (optional, for decoration)
How to Create:
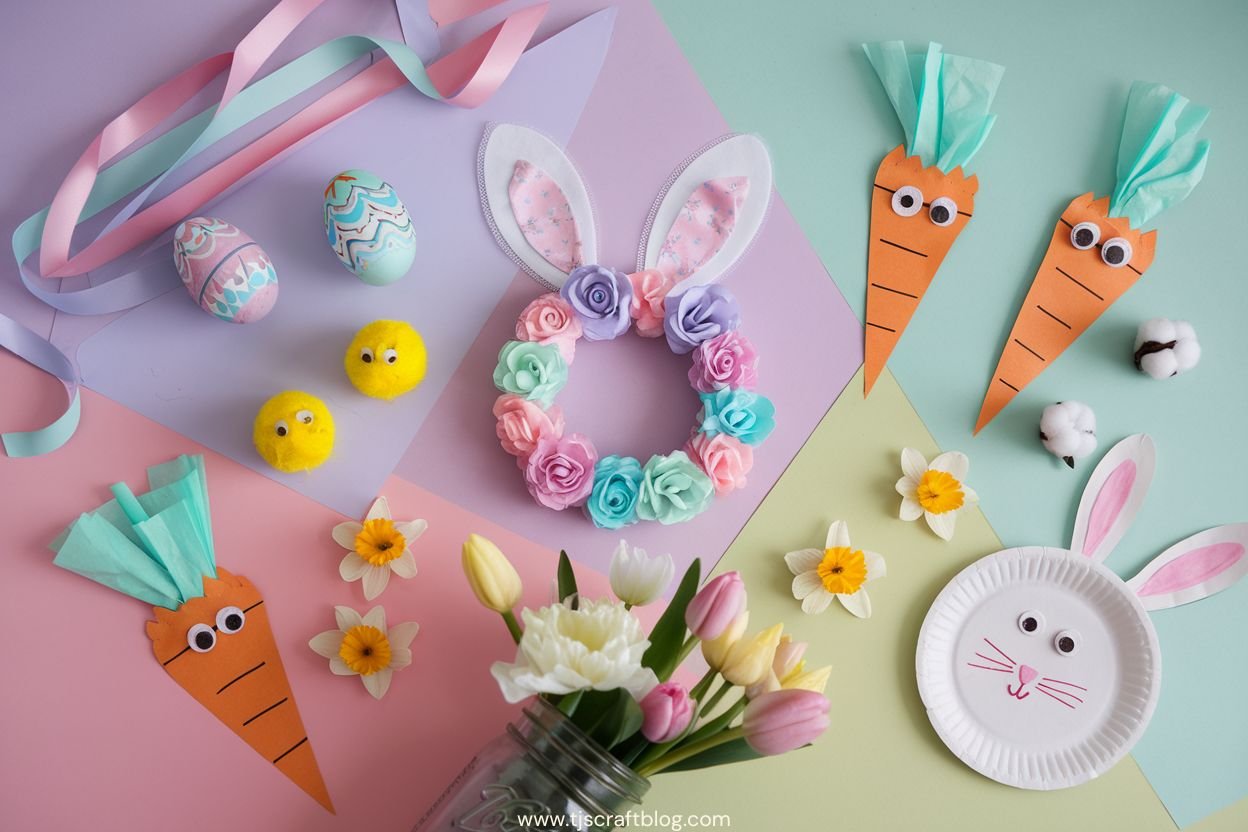
- Prepare the Bunny Base: Take one paper plate and leave it whole; this will be the bunny’s face. Cut another paper plate in half; these halves will become the bunny’s ears.
- Attach the Ears: Apply glue to the straight edge of each half-plate and attach them to the top of the whole plate, creating the bunny’s head with upright ears.
- Create the Bunny Face:
- Nose: Glue a cotton ball in the center of the plate for the bunny’s nose.
- Cheeks: Glue smaller cotton balls below the nose for rosy cheeks.
- Eyes: Glue googly eyes above the nose.
- Mouth: Draw a cute bunny smile with markers.
- Whiskers: Use markers to draw whiskers, or glue on pipe cleaners cut to size.
- Decorate the Bunny:
- Ears: Use markers or construction paper to add color and patterns to the bunny’s ears.
- Face: Draw additional details on the face, such as eyelashes or freckles.
- Bow: Glue a ribbon bow around one of the bunny’s ears for an extra touch.
Idea Deep Dive:
- Personalization: Encourage children to get creative and personalize their bunny plates with different colors, patterns, and facial expressions.
- Sensory Exploration: The use of cotton balls and other textured materials provides a tactile experience for young children.
- Fine Motor Skills: Cutting, gluing, and drawing all help develop fine motor skills.
- Storytelling: Use the finished bunny plates as props for storytelling or puppet shows.
- Party Decorations: Create multiple bunny plates and hang them up as festive Easter decorations.
- Safety First: Always supervise children when using scissors and ensure that all materials are non-toxic and safe for children.
Additional Tips:
- Use different sized paper plates to create a variety of bunny sizes.
- Add glitter or sequins to the bunny’s ears for a sparkly effect.
- Cut out shapes from construction paper to create a flower crown or other accessories for the bunny.
- Write the child’s name on the back of the plate to personalize their creation.
- Display the finished bunny plates on a wall or mantelpiece for everyone to admire.
5. Carrot Treat Bags
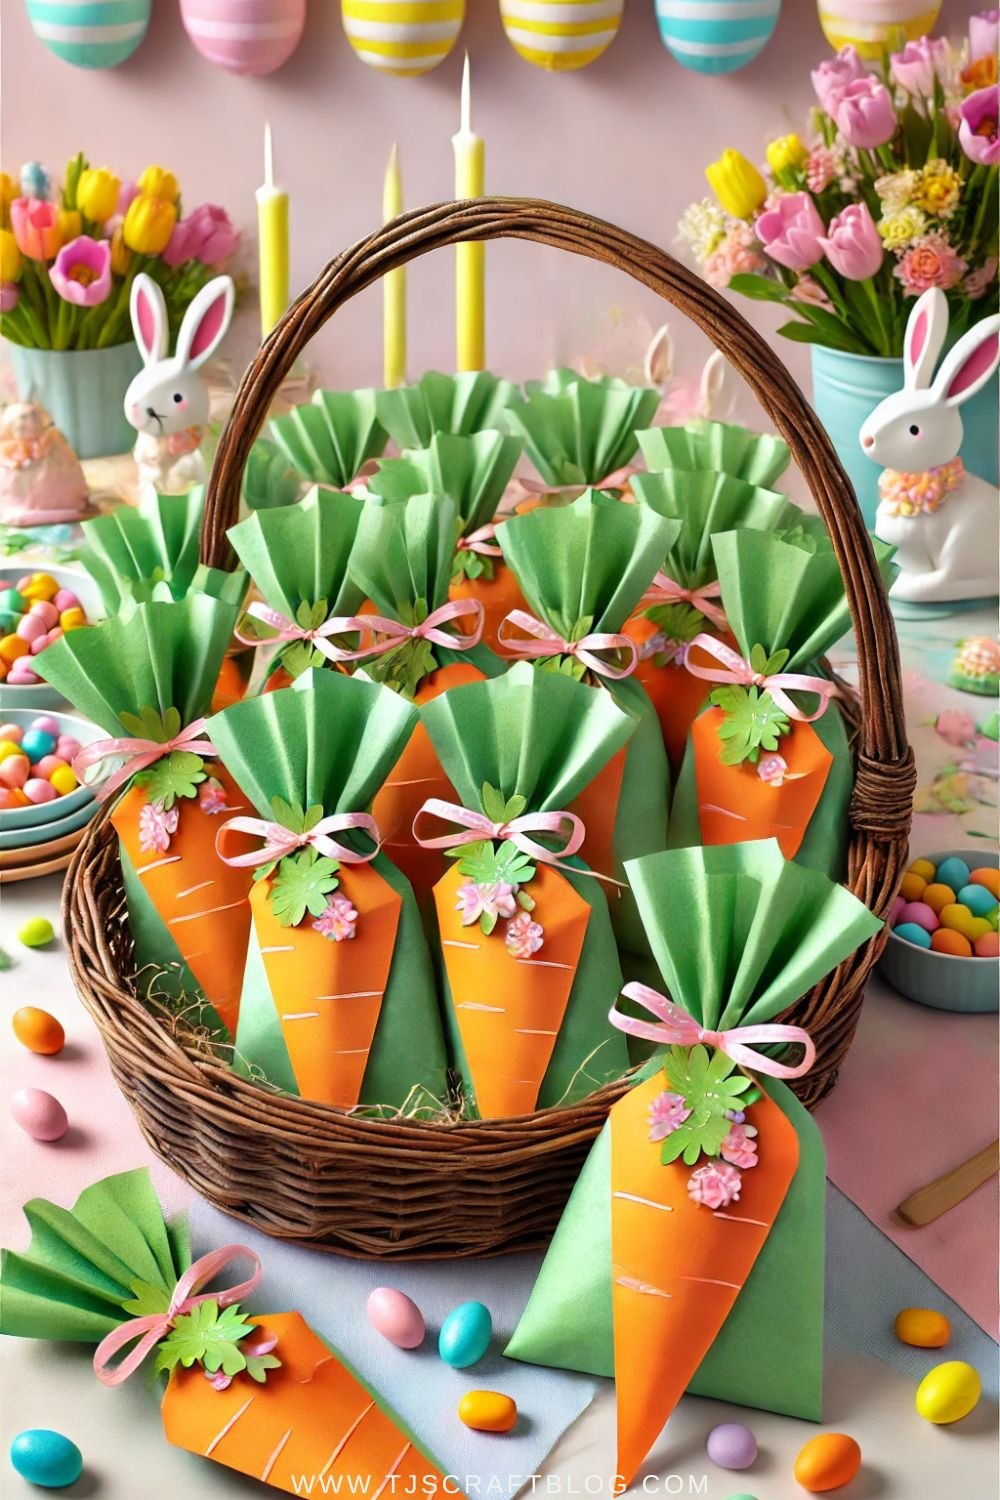
Materials Needed:
- Orange construction paper
- Green tissue paper
- Scissors
- Tape or glue
- Treats (candy, small toys)
- Ruler or pencil (for marking measurements)
- Hole punch (optional, for adding a handle)
- Ribbon or string (optional, for a handle)
How to Create:
- Cut the Carrot Shape:
- Using a ruler or pencil, lightly mark a triangle shape on the orange construction paper. The size of the triangle will determine the size of your carrot bag.
- Carefully cut along the marked lines with scissors.
- Form the Cone:
- Roll the orange triangle paper into a cone shape, overlapping the edges slightly.
- Secure the overlapping edges with tape or glue, ensuring the cone holds its shape.
- Create the Carrot Top:
- Cut several strips of green tissue paper. The strips can be varying lengths to create a more natural look.
- Gather the green tissue paper strips at one end and secure them with tape or glue to the inside top edge of the orange cone.
- Fluff and arrange the green tissue paper to resemble carrot leaves.
- Fill with Treats:
- Carefully fill the carrot cone with your desired treats. Remember not to overfill, as this can cause the cone to tear.
- Optional Handle:
- If desired, use a hole punch to create two small holes near the top of the carrot cone, opposite each other.
- Thread a ribbon or string through the holes and tie it to create a handle for easy carrying.
Idea Deep Dive:
- Size Customization: Adjust the size of the carrot bags by changing the dimensions of the orange triangle. Larger bags can hold more treats, while smaller bags are perfect for individual servings.
- Treat Variety: Fill the carrot bags with a variety of treats, such as small candies, chocolates, mini toys, or even Easter-themed stickers.
- Decoration Ideas:
- Draw or glue on additional details to the carrot bags, such as eyes, a nose, and a mouth, to create a cute character.
- Use different shades of orange and green paper to create a more visually interesting display.
- Tie a small bow around the carrot top for an extra touch of elegance.
- Alternative Uses:
- These carrot bags can also be used as party favors for a spring-themed birthday party or as a fun way to package snacks for a school lunch.
- Group Activity:
- Make this a fun group activity for kids by setting up a crafting station with all the materials and letting them create their own personalized carrot bags.
- Eco-Friendly Option:
- Consider using recycled or biodegradable paper to make these carrot bags more environmentally friendly.
Remember:
- Avoid overfilling the carrot bags, as this can cause the paper to tear and the treats to spill out.
- Use caution when using scissors and glue, especially when children are involved.
- These carrot bags are a delightful and festive way to celebrate Easter and add a touch of homemade charm to your holiday décor.
6. Pom-Pom Chicks
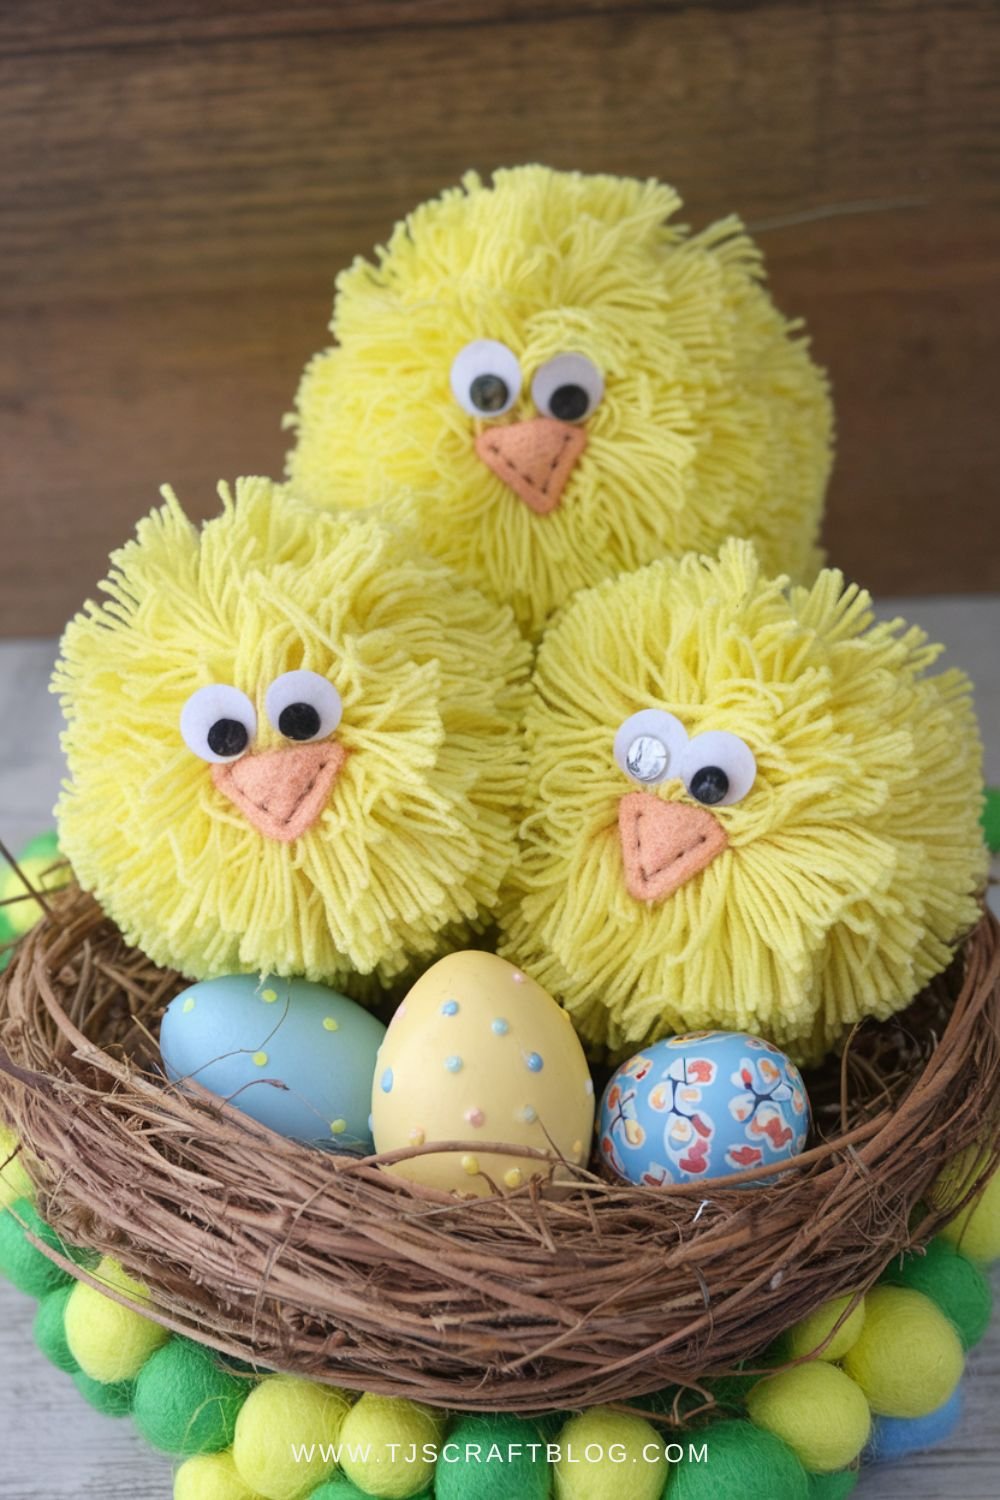
Materials Needed:
- Yellow yarn
- Scissors
- Googly eyes
- Felt (in orange or red for beaks)
- Cardboard (for creating a pom-pom template; any sturdy cardboard like a cereal box will work)
- Hot glue gun and glue sticks (optional, for attaching eyes and beak)
- Ribbon or string (optional, for hanging)
How to Create:
- Make the Pom-Pom:
- Create a Template: Cut two identical donut shapes out of cardboard. The size of the donut hole and the overall donut will determine the size of your pom-pom.
- Wrap the Yarn: Place the two donut shapes together. Start wrapping the yellow yarn around the cardboard donut, going through the center hole. Continue wrapping until the hole is filled and you have a thick layer of yarn.
- Tie and Cut: Carefully slide a piece of yarn between the two cardboard pieces and around the outer edge of the wrapped yarn. Tie this piece of yarn tightly to secure the pom-pom.
- Remove the Template: Cut the yarn loops along the outer edge of the cardboard donut. Carefully remove the cardboard pieces.
- Fluff and Trim: Fluff out the yarn to create a round pom-pom shape. Trim any uneven pieces of yarn to create a neat and uniform appearance.
- Add the Face:
- Attach Eyes: Glue or sew two googly eyes onto the front of the pom-pom.
- Create a Beak: Cut a small triangle shape out of felt and attach it to the pom-pom below the eyes to create a beak.
Idea Deep Dive:
- Yarn Colors: Experiment with different shades of yellow yarn for a variety of chick colors. You can also use other colors of yarn to create different types of birds.
- Pom-Pom Sizes: Vary the size of your cardboard donut template to create chicks of different sizes.
- Embellishments: Add additional details to your chicks with feathers, wings, or other embellishments.
- Hanging: Attach a ribbon or string to the top of the pom-pom to create hanging decorations.
- Nesting: Create a nest using twigs, grass, or other natural materials and place your chicks inside for a cute Easter display.
- Groupings: Make several chicks in different sizes and colors and group them together for a festive Easter centerpiece.
Additional Tips:
- Use sharp scissors for a cleaner cut when trimming the yarn.
- If you don’t have googly eyes, you can use beads, buttons, or even small pieces of felt to create eyes.
- For a sturdier beak, you can cut two identical triangle shapes out of felt and glue them together along the edges, leaving the bottom open to attach to the pom-pom.
- If you don’t have a hot glue gun, you can use fabric glue or sew the eyes and beak onto the pom-pom.
- To make your chicks extra fluffy, you can brush out the yarn with a pet brush or a wire brush.
- Get creative and have fun! There are endless possibilities when it comes to decorating your pom-pom chicks.
7. DIY Bunny Ears Headbands
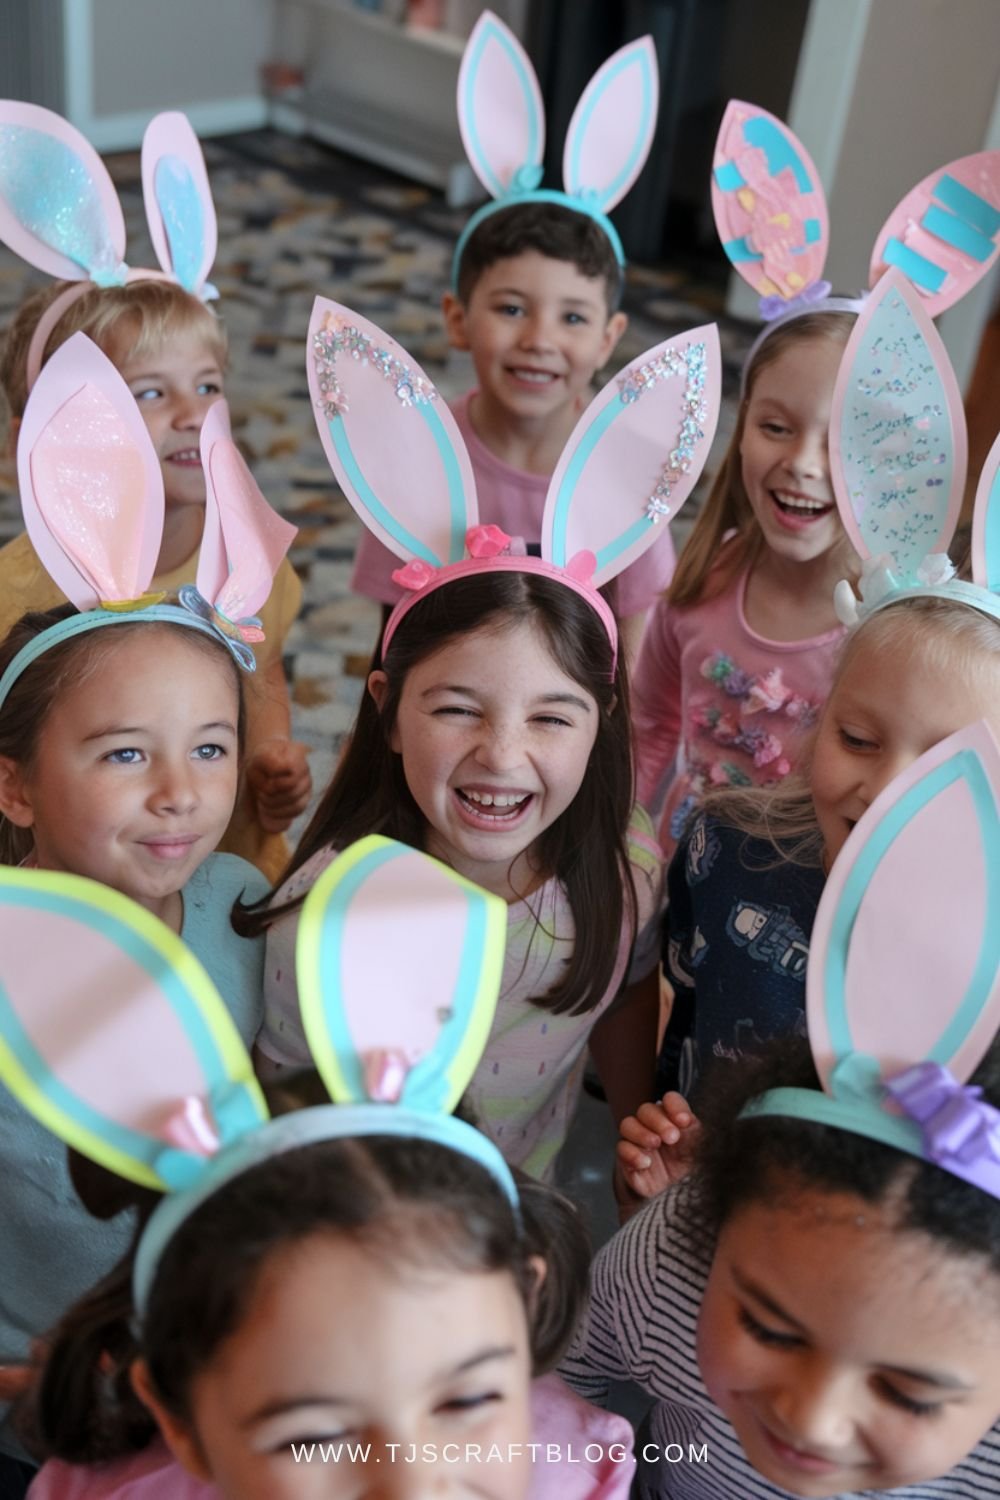
Materials Needed:
- Construction paper (white and pink)
- Headbands (plain or elastic)
- Scissors
- Glue
- Glitter (optional)
- Stickers (optional)
- Markers or crayons (optional)
How to Create:
- Cut the Bunny Ears:
- Draw large bunny ear shapes on the white construction paper. You can freehand them or use a template.
- Carefully cut out the white bunny ear shapes using scissors.
- Draw smaller inner ear shapes on the pink construction paper.
- Cut out the pink inner ear shapes.
- Assemble the Ears:
- Apply glue to the back of the pink inner ear shapes.
- Carefully position and stick the pink inner ear shapes onto the white bunny ear shapes.
- Allow the glue to dry completely.
- Attach to the Headband:
- Apply glue to the bottom of the white bunny ears.
- Position the bunny ears on the headband and press firmly.
- Make sure the ears are securely attached and allow the glue to dry completely.
Idea Deep Dive:
- Personalization: Encourage children to personalize their bunny ears with glitter, stickers, markers, or crayons. They can add dots, stripes, flowers, or any other designs they like.
- Variety: Use different colored construction paper to create a variety of bunny ears. You can also experiment with different ear shapes and sizes.
- Comfort: Make sure the headband fits comfortably and the glue is completely dry before wearing the bunny ears.
- Safety: Supervise children when using scissors and glue.
- Group Activity: This craft is a great activity for Easter parties, classrooms, or family gatherings.
- Photo Opportunity: The finished bunny ears make for adorable photo opportunities.
- Additional Decorations: Consider adding other decorations to the headband, such as a cotton ball tail or a bow.
8. Easter Egg Garland
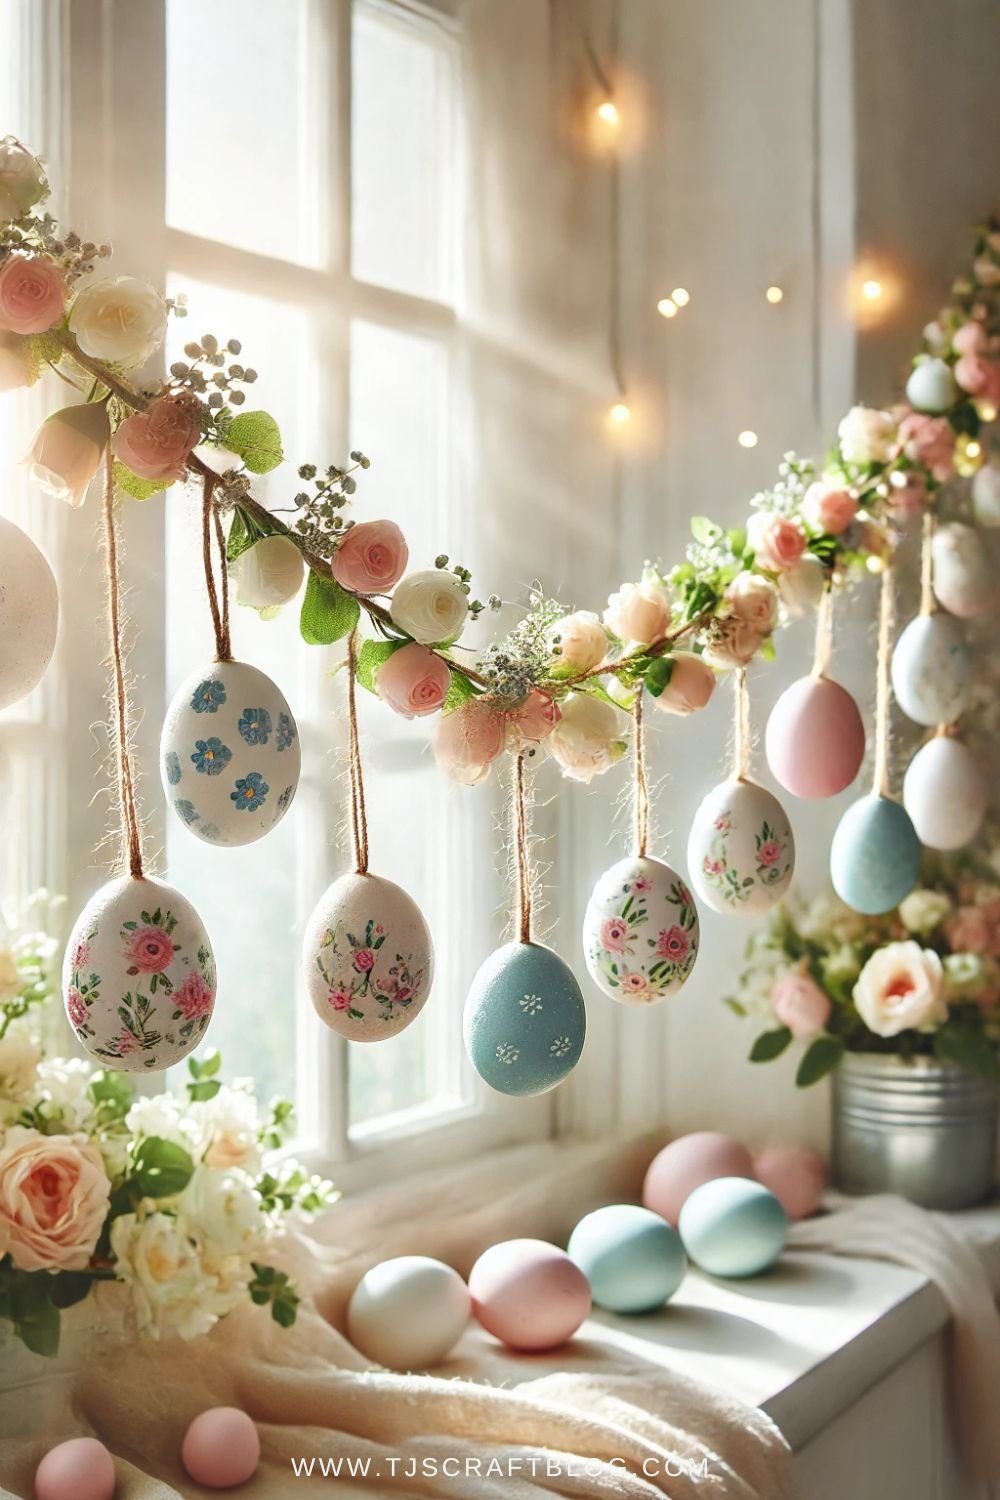
Materials Needed:
- Plastic or foam eggs (various sizes and colors for a more dynamic appearance)
- String, twine, ribbon, or yarn
- Scissors
- Hot glue gun (optional for added security)
- Paint, markers, glitter, or other embellishments for paper eggs (optional)
- Hole punch or needle (if not using hot glue)
How to Create:
- Prepare the Eggs:
- If using paper eggs, decorate them before stringing. Consider painting them with vibrant colors, drawing intricate patterns with markers, or adding a touch of sparkle with glitter.
- If desired, use a hole punch or needle to create holes in the top and bottom of each egg for stringing.
- String the Eggs:
- Method 1: Hot Glue:
- Apply a small amount of hot glue to the top of an egg.
- Quickly attach the string or twine, ensuring it adheres securely.
- Repeat with the remaining eggs, spacing them evenly along the string.
- Method 2: Holes:
- Thread the string or twine through the top hole of an egg.
- Tie a knot or add a bead to secure it in place.
- Thread the string through the bottom hole and repeat with the remaining eggs.
- Method 1: Hot Glue:
- Create the Garland:
- Once all the eggs are strung, adjust their spacing as desired.
- Secure the ends of the string by tying knots or adding loops for hanging.
Idea Deep Dive:
- Variety is Key: Mix and match different sizes, colors, and patterns of eggs to create a visually appealing garland.
- Theme It Up: Coordinate the colors and decorations of your eggs with your overall Easter theme.
- Get Creative: Use a variety of materials to decorate your eggs. Consider adding feathers, ribbons, or other embellishments.
- Safety First: Exercise caution when using a hot glue gun, as the glue can cause burns. Supervise children closely and use a low-temperature setting if possible.
- Alternative Hanging: Instead of stringing the eggs, you can attach them to a branch or hoop to create a unique Easter decoration.
- Beyond Easter: This versatile craft can be adapted for other holidays and occasions. Simply change the colors and decorations to suit your needs.
By following these simple steps and unleashing your creativity, you can craft a stunning Easter egg garland that will add a festive touch to your home.
9. Salt Dough Easter Ornaments
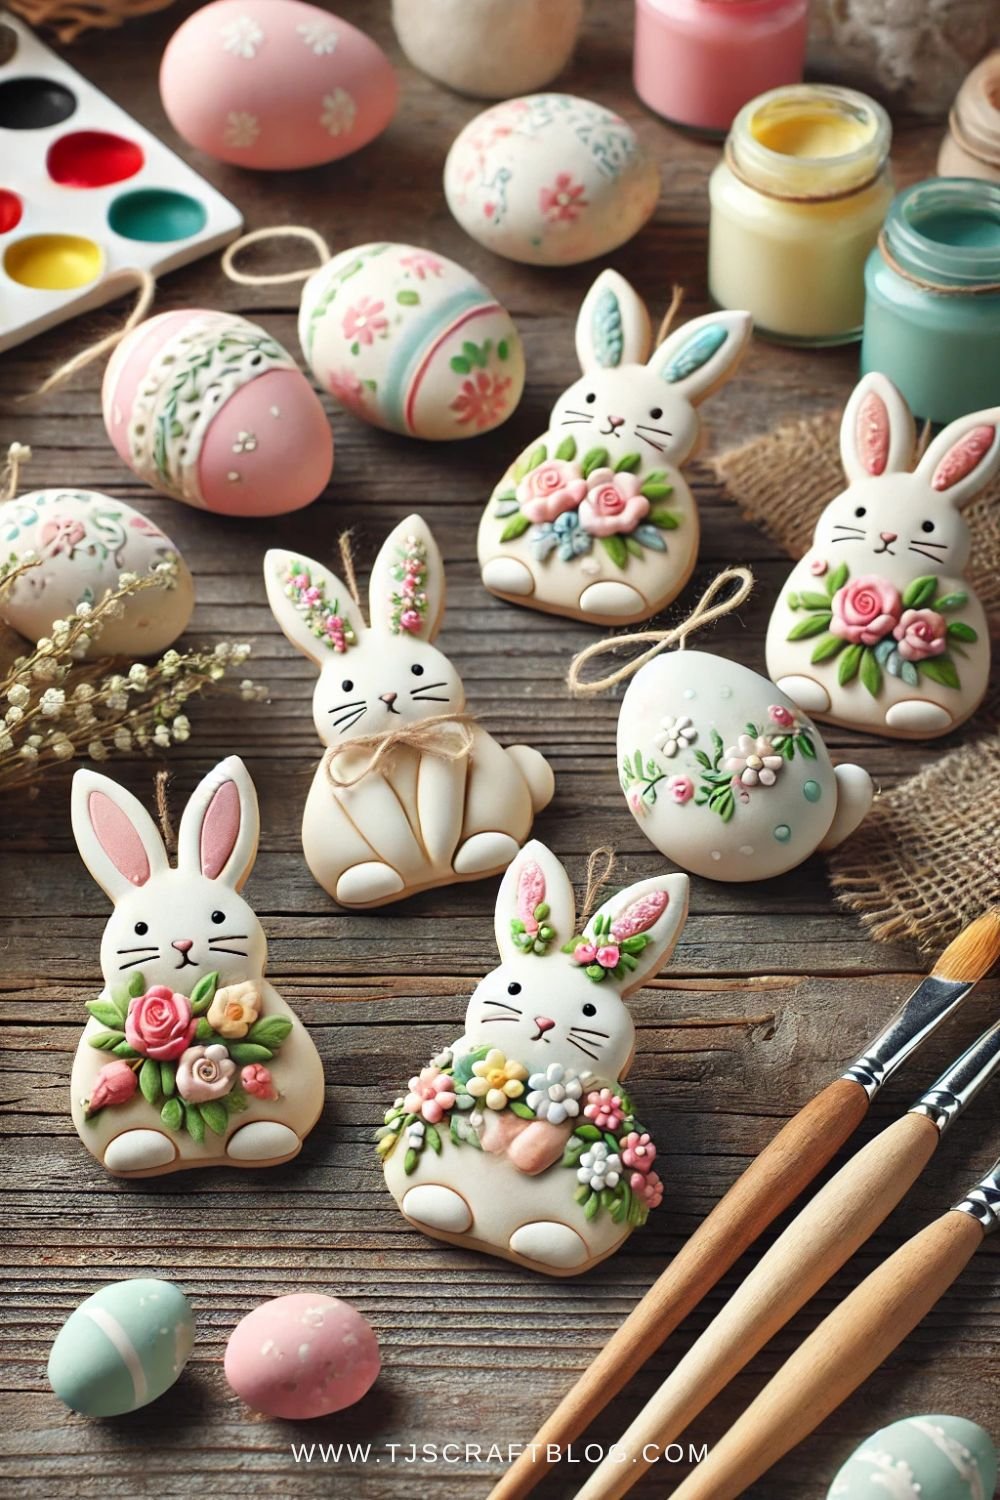
Materials Needed:
- 2 cups all-purpose flour
- 1 cup salt
- 1 cup warm water
- Rolling pin
- Cookie cutters (various Easter shapes – bunnies, eggs, chicks, carrots, flowers, etc.)
- Straw or toothpick (for creating holes for hanging)
- Parchment paper or baking sheet
- Acrylic paints, glitter, sequins, ribbons, and other embellishments
- Clear sealant spray or Mod Podge
Instructions:
- Prepare the Dough:
- In a large bowl, whisk together the flour and salt.
- Gradually add the warm water, mixing until a dough forms.
- Knead the dough on a lightly floured surface for 5-10 minutes until smooth and elastic.
- Roll and Cut Shapes:
- Preheat oven to 250°F (120°C).
- Roll out the dough on a lightly floured surface or parchment paper to about ¼ inch thickness.
- Use cookie cutters to cut out desired Easter shapes.
- Use a straw or toothpick to create a hole near the top of each ornament for hanging.
- Place the shapes on a parchment-lined baking sheet.
- Bake the Ornaments:
- Bake for 1-2 hours, or until the ornaments are completely dry and hard.
- Baking time will vary depending on the thickness of the ornaments.
- Cool and Decorate:
- Let the ornaments cool completely on a wire rack.
- Decorate the ornaments with acrylic paints, glitter, sequins, ribbons, or other embellishments.
- Get creative and personalize each ornament with unique designs and colors.
- Seal and Hang:
- Apply a clear sealant spray or Mod Podge to protect the ornaments and their decorations.
- Once the sealant is dry, thread a ribbon or string through the hole and hang the ornaments on your Easter tree, garland, or other display.
Tips and Ideas:
- Experiment with Shapes and Sizes: Use a variety of cookie cutters to create different Easter shapes and sizes. You can also use your own hands to mold unique shapes like nests, chicks, or carrots.
- Add Texture: Use a fork, toothpick, or other tools to add texture and details to your ornaments before baking.
- Create Handprint Keepsakes: Have children press their handprints into the dough to create personalized ornaments.
- Make Scented Ornaments: Add a few drops of essential oils like lavender, vanilla, or cinnamon to the dough for a subtle fragrance.
- Gift Idea: Package a set of homemade salt dough ornaments in a decorative box or bag for a thoughtful and unique Easter gift.
- Storage: Store salt dough ornaments in an airtight container in a cool, dry place to prevent them from becoming brittle or discolored.
Remember: Salt dough ornaments are fragile, so handle them with care. Avoid hanging them in areas where they may get wet or exposed to direct sunlight for extended periods. With a little creativity and effort, you can create beautiful and festive salt dough ornaments that will add a personal touch to your Easter celebrations for years to come.
10. Spring Flower Arrangements
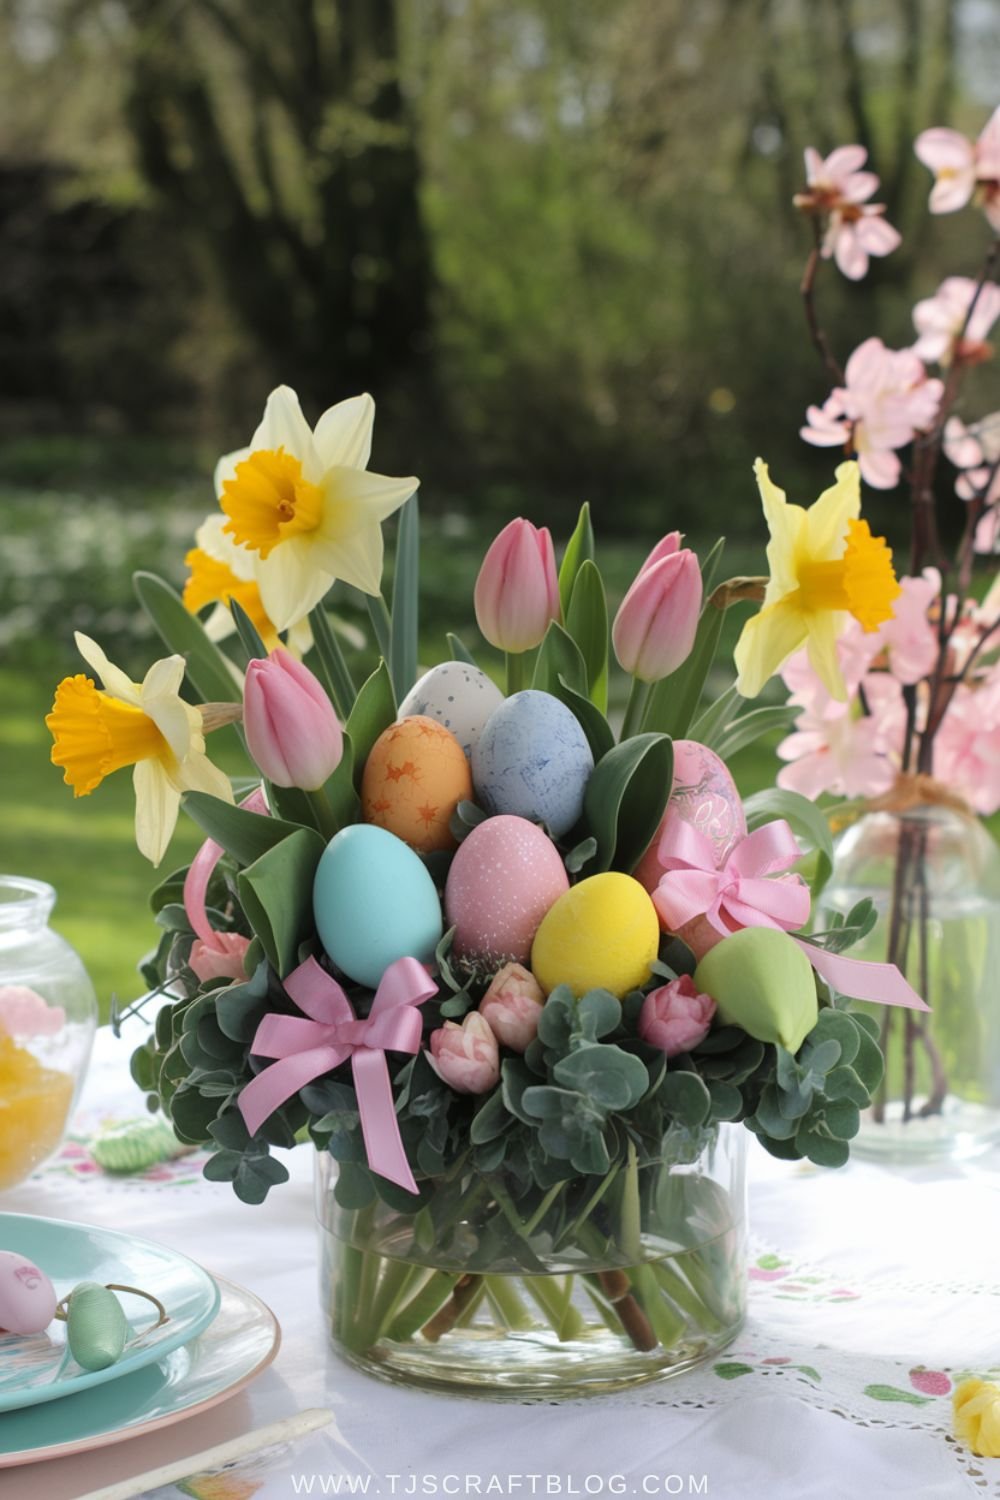
Materials Needed:
- Seasonal Blooms: Opt for flowers that capture the essence of Easter, such as vibrant daffodils, elegant tulips, cheerful hyacinths, or delicate lilies.
- Vases or Jars: Select containers that complement your chosen blooms and overall aesthetic. Consider using mason jars, vintage bottles, ceramic vases, or repurposed teacups.
- Floral Foam (Optional): This can be helpful in arranging and supporting your flowers, especially if you’re using a wider container.
- Decorative Elements: Enhance your arrangement with festive touches like colorful Easter eggs, satin ribbons, delicate lace, or rustic twine.
How to Create:
- Prepare Your Container: If using floral foam, soak it in water and place it in your chosen vase or jar.
- Arrange Your Blooms: Trim the stems of your flowers and arrange them in the container, using the floral foam for support if needed. Consider varying the heights and textures of the flowers for a more dynamic display.
- Add Decorative Elements: Nest Easter eggs amongst the blooms, tie a ribbon around the vase, or incorporate other decorative elements to personalize your arrangement.
Idea Deep Dive:
- Color Palette: Select flowers that harmonize in color, creating a cohesive and visually appealing arrangement. Consider using a mix of pastels, bright hues, or a monochromatic scheme.
- Size and Shape: Choose blooms that complement each other in size and shape, creating a balanced and harmonious display. Combine larger flowers with smaller filler flowers for added texture and depth.
- Freshness: Change the water in your vase regularly and re-trim the stems of your flowers to keep them fresh and vibrant for as long as possible.
- Placement: Display your Easter floral arrangement in a prominent location in your home, such as the dining table, entryway, or mantelpiece.
Additional Tips:
- Forage for Greenery: Supplement your floral arrangement with foraged greenery, such as pussy willow branches, ferns, or eucalyptus leaves.
- Incorporate Easter Symbols: Add a touch of whimsy by incorporating Easter symbols into your arrangement, such as bunny figurines, chick decorations, or butterfly accents.
- Create a Centerpiece: Design a stunning Easter centerpiece by arranging multiple vases or jars of flowers along the center of your dining table.
- Gift a Floral Bouquet: Share the joy of Easter by gifting a hand-arranged floral bouquet to a loved one.
By following these tips and unleashing your creativity, you can craft beautiful and festive Easter floral arrangements that will brighten your home and delight your guests.
Conclusion
Crafting for Easter is a wonderful way to celebrate the season and create lasting memories with family and friends. Whether you decorate eggs, create a bunny wreath, or make pom-pom chicks, each craft adds a personal touch to your Easter celebrations.
We’d love to see your creativity in action! Share your DIY Easter crafts on social media using the hashtag #EasterCraftsWithUs. Don’t forget to subscribe to our blog for more crafting ideas and seasonal projects!
