
Ah, spring! The world awakens from its winter slumber, birds are chirping, flowers are blooming, and the sun is finally gracing us with its presence. It’s the perfect time to throw open the windows, let in the fresh air, and give your home a refresh. But who says you need to break the bank to spruce up your space?
This spring, ditch the expensive store-bought decorations and unleash your inner artist with these 10 amazing DIY home decor projects. Not only will these crafts add a touch of personalized charm to your home, but they’ll also serve as fantastic conversation starters when you have guests over. Whether you’re a seasoned DIYer or just starting out, we’ve got something for everyone. From vibrant floral arrangements to whimsical wall art, these projects are easy to follow, budget-friendly, and guaranteed to impress.
So grab your crafting supplies, put on your creative hat, and let’s dive into these inspiring spring DIYs that will transform your home into a springtime haven!
1. Upcycled Tin Can Planters

Give those old tin cans a new lease on life by transforming them into charming planters. These rustic-chic planters are perfect for showcasing your favorite herbs, succulents, or small flowers.
Materials Needed:
- Empty, clean tin cans (various sizes)
- Acrylic paint in your desired colors
- Paintbrushes
- Hammer and nail (optional, for drainage holes)
- Potting soil
- Small plants or seedlings
Creation Steps:
- Clean and prepare: Thoroughly wash and dry your tin cans. If desired, use a hammer and nail to punch a few drainage holes in the bottom of each can.
- Paint: Apply a base coat of acrylic paint to the outside of the cans. Let dry completely.
- Add details: Get creative with your designs! Add stripes, polka dots, floral patterns, or even inspirational quotes.
- Plant: Fill the cans with potting soil and carefully plant your chosen greenery.
Idea Deep Dive:
Experiment with different painting techniques like ombre effects or stencils for intricate patterns. You can also wrap the cans with twine or fabric for a more textured look. Consider grouping different sized cans together for a visually interesting display.
2. Blooming Branch Mobile

Bring the beauty of blossoming branches indoors with this whimsical mobile. It’s a simple yet elegant way to add a touch of spring to any room.
Materials Needed:
- Several branches of varying lengths (foraged or purchased)
- Clear fishing line or thin twine
- Scissors
- Assorted faux flowers and greenery
- Hot glue gun and glue sticks
Creation Steps:
- Prepare the branches: Clean the branches and let them dry completely.
- Attach the hanging lines: Cut several lengths of fishing line or twine, and tie them securely to the branches, leaving a long loop at the top for hanging.
- Create the mobile: Gather the branches together and tie the hanging lines together at the top, adjusting the lengths to create a balanced mobile.
- Decorate: Use hot glue to attach faux flowers and greenery to the branches, creating a cascading effect.
Idea Deep Dive:
For a more natural look, use real dried flowers or pressed flowers. You can also add decorative elements like ribbons, beads, or small bird ornaments. Hang the mobile near a window to catch the sunlight and create beautiful shadows.
3. Spring-Scented Mason Jar Candles
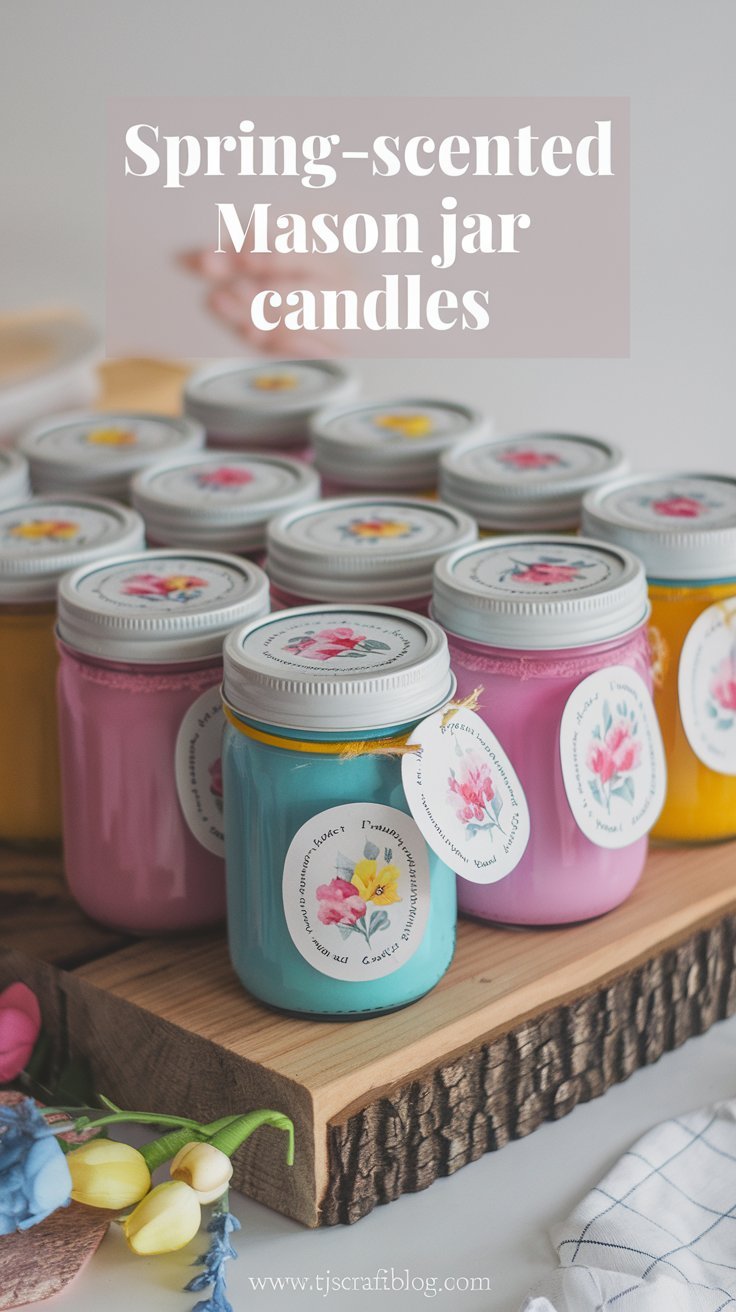
Fill your home with the refreshing scents of spring with these DIY mason jar candles. Customize the fragrance with your favorite essential oils for a truly personalized touch.
Materials Needed:
- Mason jars (any size)
- Soy wax flakes
- Wicks (sized appropriately for the jars)
- Essential oils (lavender, lemon, rose, etc.)
- Double boiler or heat-safe pot and bowl
- Wooden skewers or chopsticks
Creation Steps:
- Prepare the jars: Clean and dry the mason jars thoroughly. Attach the wicks to the bottom of the jars using a wick sticker or a dab of hot glue.
- Melt the wax: Fill the double boiler or pot with water and bring to a simmer. Place the soy wax flakes in the heat-safe bowl and set it over the simmering water. Stir occasionally until the wax is completely melted.
- Add fragrance: Remove the melted wax from the heat and let it cool slightly. Add your chosen essential oils, stirring gently to combine.
- Pour the candles: Carefully pour the scented wax into the prepared mason jars. Use a wooden skewer or chopstick to center the wicks.
- Cure: Allow the candles to cool and harden completely before burning.
Idea Deep Dive:
Decorate the mason jars with paint, twine, or fabric to match your home decor. You can also add dried flowers or herbs to the wax for a decorative touch. Experiment with different essential oil combinations to create unique and personalized scents.
4. Floral Embroidery Hoop Art

Add a touch of elegance to your walls with this beautiful floral embroidery hoop art. Even if you’re new to embroidery, this project is surprisingly easy to create.
Materials Needed:
- Embroidery hoop (any size)
- Fabric (linen or cotton work well)
- Embroidery floss in various colors
- Embroidery needle
- Scissors
- Pencil
Creation Steps:
- Prepare the hoop: Stretch the fabric taut in the embroidery hoop.
- Transfer the design: Lightly sketch your desired floral design onto the fabric using a pencil. You can find free patterns online or create your own.
- Embroider: Thread the embroidery needle with your chosen floss color and begin stitching the design. Use basic stitches like the backstitch or satin stitch.
- Finish: Once the embroidery is complete, trim the excess fabric from the back of the hoop.
Idea Deep Dive:
Don’t be afraid to experiment with different embroidery stitches and colors. You can also incorporate beads or sequins into your design for added sparkle. Consider creating a series of hoops with different floral motifs for a cohesive wall display.
5. Ombre Painted Flower Vases

Transform plain glass vases into stunning ombre masterpieces. This simple painting technique adds a vibrant and modern touch to any floral arrangement.
Materials Needed:
- Glass vases (various shapes and sizes)
- Acrylic paint in two or three coordinating colors
- Paintbrushes
- Water
- Painter’s tape (optional)
Creation Steps:
- Prepare the vases: Clean and dry the glass vases thoroughly.
- Paint the base coat: Apply the lightest color of acrylic paint to the entire vase. Let dry completely.
- Create the ombre effect: Mix the lightest color with a small amount of the next darkest color. Apply this blended color to the lower portion of the vase, blending it into the base coat.
- Add more layers: Continue layering the colors, gradually adding more of the darkest color to create a smooth ombre transition.
- Finishing touches: If desired, use painter’s tape to create stripes or other geometric patterns before painting.
Idea Deep Dive:
Experiment with different color combinations to create unique ombre effects. You can also use spray paint for a more even finish. Consider grouping several ombre vases together for a dramatic centerpiece.
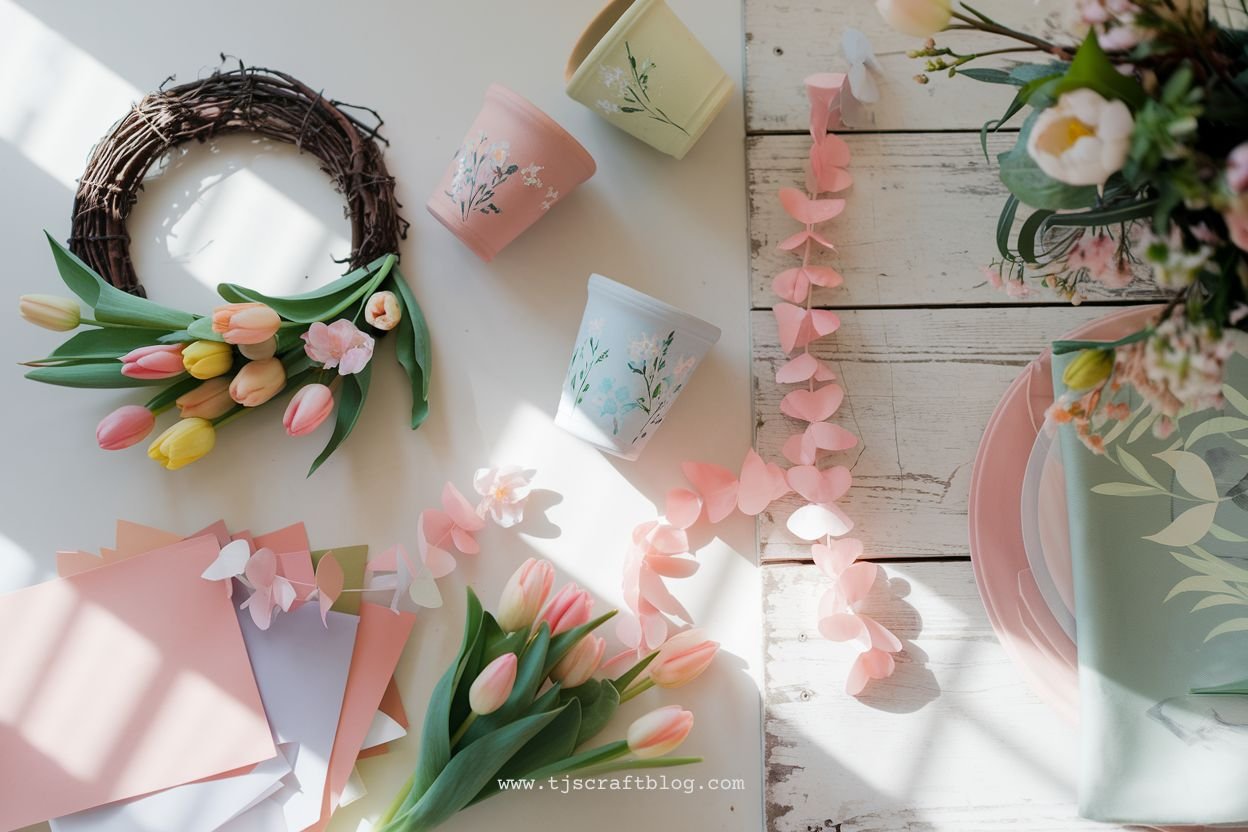
6. DIY Spring Wreath with Natural Elements

Welcome guests with a charming spring wreath made from natural elements like twigs, moss, and flowers. This rustic wreath brings a touch of the outdoors to your front door.
Materials Needed:
- Grapevine wreath base
- Twigs and branches (foraged or purchased)
- Moss
- Faux flowers and greenery
- Hot glue gun and glue sticks
- Wire or floral wire
Creation Steps:
- Prepare the base: If needed, reinforce the grapevine wreath with wire to ensure it’s sturdy.
- Add the twigs: Attach the twigs and branches to the wreath base using wire or hot glue, creating a layered and textured look.
- Incorporate the moss: Fill in any gaps with moss, securing it with hot glue.
- Add floral accents: Arrange faux flowers and greenery around the wreath, securing them with hot glue.
Idea Deep Dive:
For a more natural look, use real dried flowers or preserved foliage. You can also add other natural elements like pinecones, feathers, or shells. Consider incorporating a ribbon or burlap bow for a touch of color.
7. Decorative Throw Pillows with Spring Motifs

Add a pop of spring to your sofa or bed with these DIY throw pillows. Choose fabrics with floral patterns, pastel colors, or spring-themed designs.
Materials Needed:
- Pillow forms (in your desired size)
- Fabric (cotton, linen, or upholstery fabric)
- Sewing machine (or needle and thread)
- Scissors
- Pins
- Zipper or buttons (optional)
Creation Steps:
- Cut the fabric: Measure and cut two pieces of fabric that are slightly larger than your pillow forms, allowing for seam allowances.
- Sew the pillowcase: Pin the fabric pieces together with right sides facing. Sew along three sides, leaving one side open.
- Insert the pillow form: Turn the pillowcase right side out and insert the pillow form.
- Close the opening: Sew the remaining side closed by hand or machine. Alternatively, add a zipper or buttons for easy removal.
Idea Deep Dive:
Get creative with your fabric choices! Use different patterns and textures to create a unique look. You can also add embellishments like tassels, pom-poms, or embroidery. Consider making a set of coordinating pillows for a cohesive look.
8. Repurposed Birdcage Planter

Give an old birdcage a new purpose by transforming it into a whimsical planter. This unique hanging planter adds a touch of vintage charm to your porch or patio.
Materials Needed:
- Vintage birdcage
- Potting soil
- Small plants or flowers
- Moss (optional)
- Decorative stones or pebbles (optional)
Creation Steps:
- Prepare the birdcage: Clean the birdcage thoroughly and remove any unnecessary parts.
- Line the bottom: If desired, line the bottom of the birdcage with moss to prevent soil from falling through.
- Add drainage: Place a layer of decorative stones or pebbles at the bottom for drainage.
- Plant: Fill the birdcage with potting soil and carefully plant your chosen greenery.
Idea Deep Dive:
Choose plants that will thrive in the environment where you plan to hang the birdcage. You can also add decorative elements like bird ornaments, faux nests, or ribbons. Consider hanging multiple birdcages at different heights for a visually interesting display.
9. Spring-Themed Wall Art with Pressed Flowers

Preserve the beauty of spring flowers by creating this delicate pressed flower wall art. It’s a simple and elegant way to add a touch of nature to your home.
Materials Needed:
- Fresh flowers (flat varieties work best)
- Heavy books or flower press
- Picture frame
- Cardstock or decorative paper
- Glue
Creation Steps:
- Press the flowers: Place the fresh flowers between the pages of a heavy book or in a flower press. Leave them to dry for several days or weeks.
- Prepare the frame: Choose a picture frame that complements your decor and fits the size of your pressed flowers.
- Arrange the flowers: Carefully arrange the dried flowers on the cardstock or decorative paper.
- Frame the artwork: Once you’re happy with the arrangement, glue the flowers in place and insert the artwork into the frame.
Idea Deep Dive:
Experiment with different flower varieties and colors to create unique designs. You can also add other elements like leaves, ferns, or even handwritten quotes. Consider creating a series of pressed flower artwork for a gallery wall.
10. DIY Spring Garland with Paper Flowers

Add a festive touch to your mantelpiece or staircase with this cheerful paper flower garland. This project is a great way to use up scrap paper and add a pop of color to your home.
Materials Needed:
- Colorful cardstock or scrapbook paper
- Scissors
- Glue or double-sided tape
- String or twine
- Pencil (optional, for tracing templates)
Creation Steps:
- Create the flower templates: Draw or find free templates for different flower shapes. Trace the templates onto the cardstock and cut them out.
- Assemble the flowers: Layer the flower cutouts and glue or tape them together to create dimension.
- String the garland: Attach the flowers to the string or twine using glue or tape, spacing them evenly.
Idea Deep Dive:
Experiment with different paper types and colors to create a variety of flowers. You can also add embellishments like glitter, beads, or buttons. Consider making different lengths of garland to decorate various areas of your home.
Bringing it all Together

With these 10 DIY spring home decor projects, you can transform your living space into a vibrant and welcoming haven. Remember to personalize each project to reflect your unique style and preferences. Don’t be afraid to experiment with different materials, colors, and techniques. Most importantly, have fun and enjoy the process of creating something beautiful for your home!
Ready to get started? Choose your favorite project from the list and gather your supplies. We can’t wait to see what you create! Share your spring DIY creations with us on social media using the hashtag #SpringDIYWow. Happy crafting!