This post may contain affiliate links, meaning I may earn a small commission at no extra cost to you.

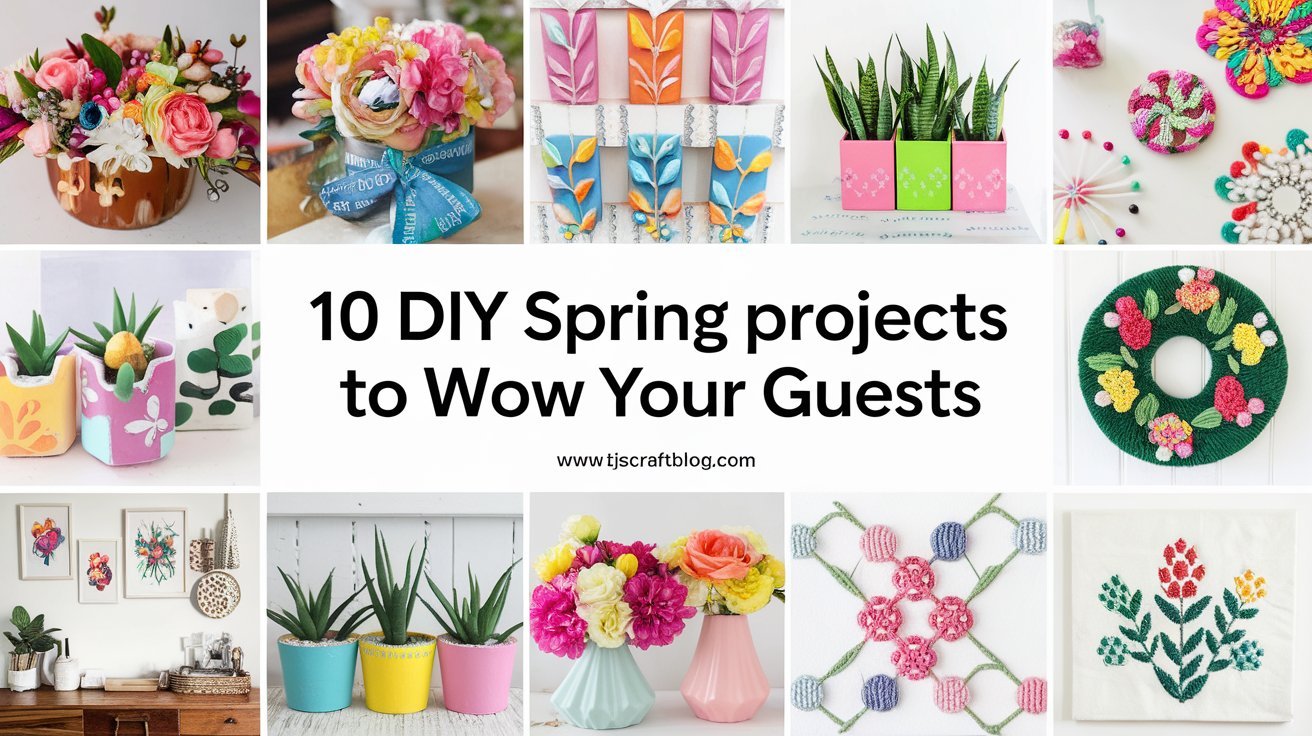
Spring is the season of renewal—a time when nature blossoms and energy is restored. It’s also the perfect opportunity to breathe new life into your home with fresh, creative, and budget-friendly Spring DIY projects. Whether you’re looking to spruce up your entryway, refresh your living room, or add charm to your outdoor space, these easy spring DIY crafts for home will transform your space with minimal effort and cost.
Let’s explore 15 simple yet impactful ways to bring those spring decorating ideas to life!
Brighten Up Your Entryway

Your home’s entryway is the first impression for guests and sets the tone for the rest of your space. By implementing a few simple DIY projects, you can instantly transform your entryway into a welcoming and vibrant area that reflects your personal style. Consider adding a fresh coat of paint in a cheerful color, updating your door hardware, or incorporating a stylish new welcome mat. You could also include a small bench or console table for added functionality and display a few carefully chosen decorative items, such as a vase of fresh flowers, a scented candle, or a stack of your favorite books. Don’t forget to add a personal touch with framed photos or artwork. With a little creativity and effort, you can easily create an entryway that is both stylish and inviting, leaving a lasting positive impression on everyone who enters your home.
1. Paint Your Front Door a Cheerful Spring Color
One of the easiest and most impactful ways to give your home a spring makeover is by painting your front door a cheerful, seasonal color. Think soft pastels like a gentle mint green, a calming robin’s egg blue, or a vibrant sunflower yellow. These colors evoke the feeling of springtime and create a welcoming atmosphere for guests.
This simple DIY project can be completed in a day and offers a significant return on investment by instantly boosting your home’s curb appeal. To start, choose a high-quality exterior paint that is durable and can withstand the elements. Clean your door thoroughly and remove any loose paint or hardware. Apply a primer if necessary, and then paint your door with smooth, even strokes. Consider adding a fresh coat of clear sealant to protect the paint and ensure a long-lasting finish.
To further enhance your front entrance, you can also update your door hardware with a new handle, knocker, or kick plate. Adding a seasonal wreath or potted plants can also complement your newly painted door and complete the spring refresh. Remember to choose colors and accessories that match your home’s overall style and create a cohesive look.
2. DIY Welcome Mat with Stencils and Paint
Upgrade your doormat with a personalized message or spring motif. Use outdoor paint and a stencil to create floral designs or fun greetings like “Hello Spring.”DIY Spring Welcome Mat
Materials:
- Plain coir doormat
- Outdoor acrylic paints (spring colors)
- Stencils (floral patterns, spring motifs, greetings)
- Painter’s tape
- Stencil brush or sponge
- Clear acrylic spray sealant
Instructions:
- Position stencil: Lay doormat on a protected surface. Secure stencil with painter’s tape.
- Apply paint: Dab paint evenly onto the surface with stencil brush or sponge.
- Dry and remove: Allow paint to dry completely before removing stencil.
- Add details: Add multiple designs, layer stencils, or incorporate freehand details.
- Seal and protect: Seal the design with clear acrylic spray sealant.
Tip: Clean and store stencils after use.
3. Add Potted Plants or DIY Planters
Line your entryway with potted tulips, daffodils, or hyacinths. For a personal touch, make your own planters from upcycled items like tin cans or wooden crates.Upcycled Planter How-To
Gather Materials:
- Look for items around your house that could hold a plant, such as tin cans, wooden crates, old boots, or even mason jars.
Prep Your Item:
- Clean the item thoroughly.
- If needed, sand rough edges or remove any labels.
- For items that might leak, consider adding a plastic liner or sealing the inside.
Decorate:
- Get creative! Use paint, markers, fabric, ribbon, or other embellishments to decorate your planter.
- Consider the overall aesthetic of your home and create a design that complements it.
Drainage:
- If your item doesn’t have drainage holes, add some to the bottom to allow excess water to escape.
Plant:
- Add soil and your chosen plant to your newly created planter.
Enjoy:
- Place your unique planter in a spot where you can enjoy it and add a touch of spring to your home!
Refresh Your Living Room Decor

The strategic placement of a few key pieces can quickly transform your living room into a space that embodies the light, airy, and refreshing essence of spring. Consider incorporating brighter colors, lighter fabrics, and natural elements to create a seasonal ambiance.
4. DIY Throw Pillow Covers with Floral or Pastel Fabrics
Swap out heavy winter textures for light, breathable fabrics. Use floral or pastel prints to sew or tie new pillow covers. No sewing machine? Try no-sew methods using fabric glue or iron-on adhesive.
DIY Throw Pillow Covers with Floral or Pastel Fabrics
One of the easiest ways to transition your home decor from the drabness of winter to the vibrancy of spring is by switching out your throw pillow covers. Replace heavy fabrics like velvet or wool with lighter, more breathable options like linen or cotton.
Fabric Choices:
- Floral Prints: Embrace the essence of spring with bright and cheerful floral patterns. Choose from small, delicate blossoms or large, bold blooms, depending on your personal style.
- Pastel Colors: Soft pastel shades like lavender, mint green, and blush pink evoke a sense of calm and serenity, perfect for creating a relaxing spring ambiance.
- Other Spring-Inspired Patterns: If florals and pastels aren’t your style, consider other spring-inspired patterns like stripes, gingham, or polka dots.
No-Sew Methods:
- Fabric Glue: For a quick and easy no-sew option, use fabric glue to attach your fabric to an existing pillow cover or to create a new one from scratch.
- Iron-On Adhesive: Another no-sew method is to use iron-on adhesive to attach your fabric to a pillow cover. This is a great option if you don’t want to deal with messy glue.
- Ribbon or Twine: For a simple and rustic look, tie your fabric around a pillow using ribbon or twine. This is a great way to add a touch of personality to your pillow covers.
Sewing Methods:
- Basic Sewing Machine Skills: If you have basic sewing machine skills, you can easily sew your own pillow covers. There are many free online tutorials and patterns available.
- Hand Sewing: If you don’t have a sewing machine, you can also hand sew your pillow covers. This will take more time, but it can be a relaxing and enjoyable activity.
Additional Tips:
- Mix and Match: Don’t be afraid to mix and match different floral and pastel fabrics to create a unique and eclectic look.
- Embellishments: Add embellishments like tassels, pom-poms, or buttons to your pillow covers for an extra touch of personality.
- Seasonal Updates: Update your pillow covers seasonally to keep your home decor fresh and inviting.
By following these simple tips, you can easily create beautiful and stylish DIY throw pillow covers that will instantly refresh your home decor for spring.
5. Create a Spring-Themed Gallery Wall Using Printable Art
One easy and budget-friendly way to bring spring indoors is to create a gallery wall with a spring theme using printable art. You can find a variety of free or low-cost printables featuring botanical prints, spring quotes, or watercolor designs that can quickly transform a wall. Use mismatched frames for a rustic-chic look. These printables can quickly and easily transform a blank wall into a vibrant and colorful spring display.
6. Rearrange Furniture for a Lighter, Airier Feel
One easy and budget-friendly way to instantly refresh your home for spring is to rearrange your furniture. Start by considering the natural light in your space. Reposition sofas, chairs, and tables to maximize the amount of sunlight that enters the room. This will instantly make your space feel lighter and airier, which perfectly embodies the spirit of spring.
Additionally, think about the flow of the room. Move furniture away from doorways and walkways to create a more open and breathable feel. Consider creating conversation areas by arranging chairs and sofas facing each other.
Finally, add some spring-inspired touches to your rearranged space. Drape a light throw blanket over the back of a sofa or chair, or add a woven rug to the floor. These simple additions will amplify the spring aesthetic and make your home feel fresh and new.
Kitchen Touch-Ups That Pack a Punch

The kitchen, being the central hub and gathering place of your home, deserves a revitalizing seasonal makeover. Breathe new life into this space with these effortless and budget-friendly updates that will instantly elevate its ambiance and welcome the spirit of spring. Consider incorporating fresh pops of color through vibrant dish towels, cheerful floral arrangements, or a newly painted accent wall. Introduce natural elements with a bowl of fresh fruit, a potted herb garden on the windowsill, or woven baskets for storage. Declutter countertops and reorganize cabinets to create a sense of openness and tranquility. Replace outdated hardware with modern fixtures for an instant facelift. Switch out heavy curtains for sheer drapes that allow natural light to flood the space. These simple yet impactful changes will transform your kitchen into a bright and airy sanctuary that is perfect for both cooking and entertaining.
7. Replace Cabinet Hardware for a Quick Upgrade
One of the easiest and most budget-friendly ways to give your kitchen or bathroom cabinets a quick facelift is to swap out the existing knobs and pulls. Consider replacing them with more modern or eye-catching options in materials like polished brass, brushed nickel, colorful ceramic, or even sparkling glass. This simple change can instantly elevate the overall look and feel of your cabinetry and add a touch of personality to your space. You can choose knobs and pulls that match your existing decor or go for a bolder look to create a statement.
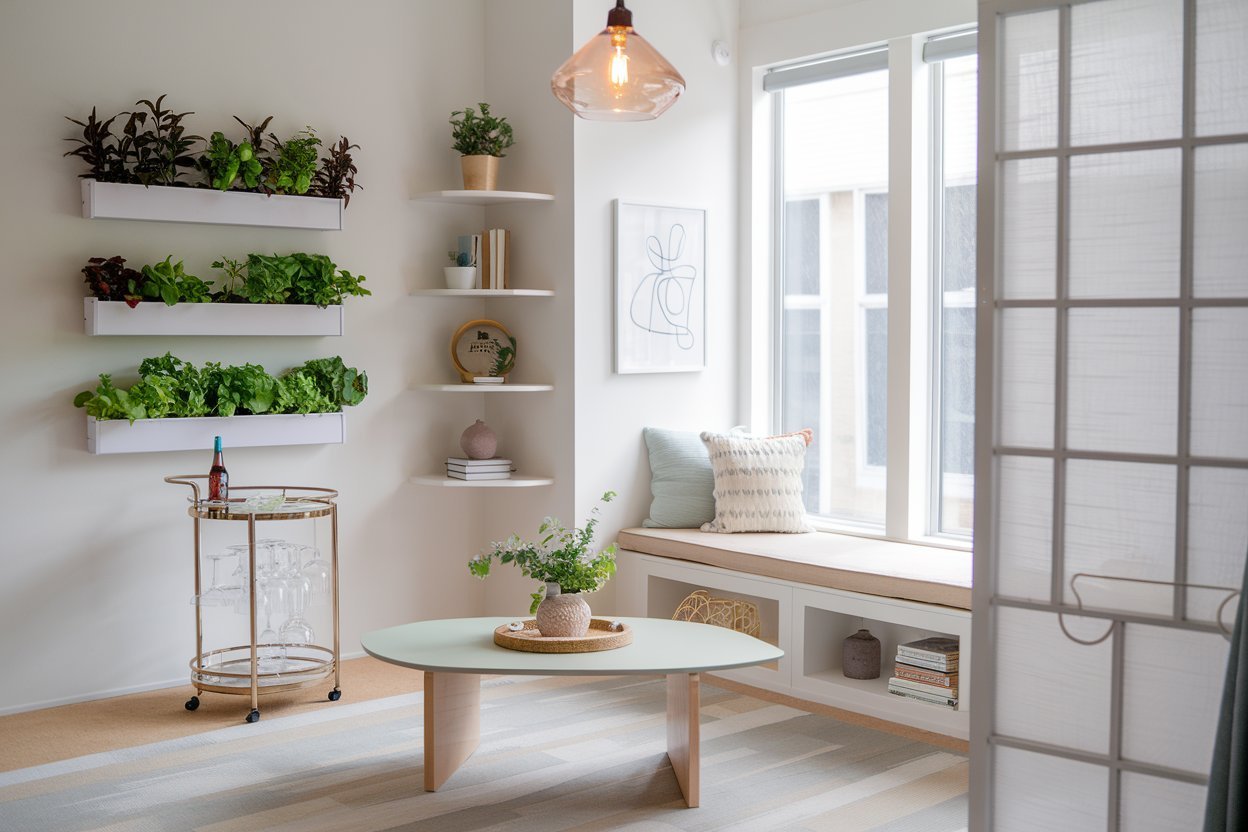
8. DIY Herb Garden Using Mason Jars or Planters
Transform your kitchen windowsill into a vibrant, fragrant herb garden. Easy-to-grow herbs like basil, mint, and parsley thrive in containers with ample sunlight. Repurpose glass jars or small pots, and fill them with nutrient-rich potting mix. Ensure proper drainage to prevent root rot.
Additional Tips & Ideas:
- Sunlight: Most herbs need at least 6 hours of sunlight per day. A south-facing window is ideal.
- Watering: Water your herbs regularly, but avoid overwatering. Allow the soil to dry out slightly between waterings.
- Fertilizing: Feed your herbs with a balanced liquid fertilizer every few weeks during the growing season.
- Harvesting: Regularly harvest your herbs to encourage new growth. Pinch off leaves as needed for cooking.
- Creative Containers: Get creative with your containers! Use mason jars, teacups, vintage tins, or even upcycled food containers.
- Chalkboard Labels: Add a touch of rustic charm with chalkboard labels. Write the herb’s name or draw a little picture.
- Herb Combinations: Plant different herbs together for a visually appealing and aromatic display.
- Vertical Gardening: Maximize your windowsill space with a vertical herb garden. Use hanging planters or a tiered shelf.
- Indoor Herb Garden Kit: If you’re new to gardening, consider an indoor herb garden kit. It will provide you with everything you need to get started.
Benefits of Growing Herbs Indoors
- Fresh Flavors: Enjoy the fresh, vibrant flavors of homegrown herbs in your cooking.
- Air Purification: Herbs help to purify the air and add a touch of nature to your home.
- Therapeutic Aromas: The scents of herbs can be calming and uplifting.
- Sustainable Living: Growing your own herbs reduces food waste and packaging.
- Year-Round Gardening: Enjoy fresh herbs all year round, regardless of the weather outside.
- Educational Opportunity: Growing herbs is a great way to teach children about gardening and healthy eating.
With a little care and attention, you can easily grow a thriving herb garden on your windowsill. Not only will it add beauty and fragrance to your home, but it will also provide you with a fresh supply of herbs for your culinary creations.
9. Add Open Shelves with Spring-Styled Dishware or Decor
Floating shelves offer a versatile and stylish solution for showcasing your favorite seasonal items. In the springtime, consider adorning your shelves with vibrant floral arrangements in pretty vases or pitchers. Colorful ceramic dishes and glassware can add a touch of whimsy, while decorative objects like vintage birdcages or botanical prints can enhance the spring theme. For a fresh and airy look, incorporate natural elements such as woven baskets, seashells, or terrariums filled with succulents. The open concept of floating shelves allows you to easily switch out your displayed items as the seasons change, making it a simple way to refresh your home decor throughout the year.
Outdoor Spaces Revival

Transform your porch, patio, or balcony into a springtime oasis with these do-it-yourself spring decor ideas, designed to revitalize your living spaces and extend the beauty of your home’s interior to the outdoors. Embrace the warmer weather and blossoming nature by incorporating vibrant colors, fresh textures, and lively patterns into your outdoor haven.
Consider adding colorful throw pillows and weather-resistant outdoor rugs to create a cozy and inviting seating area. Hang string lights or lanterns to provide a warm and enchanting glow for evening gatherings. Introduce potted plants and flowers to infuse the space with natural beauty and fragrance. Incorporate decorative elements like wind chimes, bird feeders, or outdoor wall art to add personality and charm.
By implementing these simple yet impactful DIY spring decor ideas, you can effortlessly transform your outdoor living space into a welcoming retreat that reflects the beauty and vibrancy of the season.
10. DIY Outdoor Lanterns or Fairy Light Jars
Use mason jars, battery-operated fairy lights, and wire to create whimsical outdoor lanterns. Hang them along railings or place them on tables for evening ambiance.
DIY Fairy Light Mason Jar Lanterns
Materials:
- Mason jars (various sizes)
- Battery-operated fairy lights
- Thin wire or twine
- Decorative elements (ribbons, twine, paint)
Instructions:
- Insert Lights: Carefully place the fairy lights into each mason jar, concealing the battery pack inside.
- Decorate: Personalize your lanterns by adding ribbons, wrapping twine around the jar, or painting them.
- Create Hanger: Use wire or twine to form a loop or handle for hanging.
- Hang and Enjoy: Hang your lanterns from tree branches, porch railings, or shepherd’s hooks. Alternatively, place them on tables or cluster them together for a magical glow.
11. Paint or Stain Patio Furniture
Give your weathered furniture a new lease on life with a fresh coat of paint or wood stain. For a bold and invigorating update, choose vibrant hues like sunny yellow, refreshing turquoise, or lively coral. If you prefer a more calming and earthy ambiance, opt for natural tones such as warm honey, rich mahogany, or soft sage green. Before applying the paint or stain, ensure the furniture is clean and sanded for optimal adhesion and a smooth finish. Consider adding a protective topcoat to shield the furniture from scratches and wear, especially if it will be used outdoors or in high-traffic areas. By revitalizing your old furniture with paint or stain, you can instantly transform the look and feel of your space without breaking the bank.
12. Create a Vertical Garden or Planter Wall
Maximize small spaces by attaching planters to a pallet or trellis. This vertical garden can house flowers, herbs, or even succulents for a modern twist.
Mini How-To: Build a Vertical Garden
- Choose Your Base: Select a wooden pallet for a rustic look or a trellis for a classic aesthetic.
- Attach Planters: Securely fasten terracotta pots, metal containers, or upcycled mason jars to the base using hooks, screws, or strong wire.
- Paint for Cohesion: (Optional) Paint the base and planters in a complementary color scheme.
- Select Your Plants: Choose colorful flowers for vibrancy, herbs for a kitchen garden, or succulents for a modern look. Consider sunlight requirements and plant care.
- Ensure Proper Drainage and Watering: Make sure planters have drainage holes and water plants regularly.
- Enjoy Your Vertical Garden: Add a touch of nature and a unique focal point to your home!
Bathroom & Bedroom Refresh

Refresh your home for spring by adding light, airy fabrics, soft colors, and natural materials. Declutter and deep clean, then bring in houseplants and fresh flowers. Add fragrance with scented candles, diffusers or potpourris with spring scents.
13. DIY Floral Wreath for Bathroom Door or Bedroom Wall
One charming and versatile spring DIY project is to craft a personalized wreath. Gather materials such as faux flowers in vibrant spring colors, a grapevine base for a rustic touch, and ribbons in coordinating shades. Arrange the faux flowers on the grapevine base, securing them with floral wire or hot glue. Add loops of ribbon for a touch of elegance.
Once your wreath is complete, hang it in a prominent location to instantly refresh your home decor. Consider hanging it above your bed for a romantic and feminine touch, on your front door to welcome guests with spring cheer, or above a vanity to add a touch of charm and personality. You can also create multiple wreaths in different sizes and styles to decorate various areas of your home.
14. Make a Spring-Scented Candle or Room Spray
DIY Spring-Scented Candles
Materials:
- Soy wax
- Essential oils (lavender, lemon, eucalyptus, etc.)
- Wicks
- Heat-safe containers
Instructions
- Melt the Wax: Use a double boiler or a heat-safe pouring pitcher in a pot of simmering water to melt the soy wax.
- Add Scent: Once the wax is melted, add your desired essential oils.
- Pour: Carefully pour the scented wax into your prepared containers, ensuring the wicks are centered.
- Cool and Set: Allow the candles to cool and set completely.
- Trim Wicks: Trim the wicks before using.
DIY Room Spray How-To
Materials:
- Distilled water
- Witch hazel
- Essential oils
- Spray bottle
Instructions:
- Combine distilled water and witch hazel in a spray bottle.
- Add your chosen essential oils to the mixture.
- Shake well to combine.
- Use the room spray to freshen up any space in your home!
Additional Ideas for Using Essential Oils in Home Fragrance:
- Diffusers: Add water and a few drops of essential oils to an essential oil diffuser to spread fragrance throughout your home.
- Reed Diffusers: Create your own reed diffuser by combining carrier oil (like sweet almond oil) with essential oils in a small jar. Insert reed sticks into the mixture and place the diffuser in any room.
- Potpourri: Refresh dried potpourri with a few drops of essential oils.
- Linen Spray: Lightly mist your linens with a diluted essential oil spray for a subtle fragrance.
- Cleaning Products: Add a few drops of essential oils to homemade cleaning solutions for a natural and refreshing scent.
Remember: When using essential oils, always follow safety guidelines. Some essential oils may be irritating to the skin or respiratory system, so it’s important to dilute them properly and use them in well-ventilated areas. If you have any concerns, consult with a qualified aromatherapist or healthcare professional.
15. Create a Fabric Headboard or Accent Wall Using Peel-and-Stick Wallpaper
Transform your bedroom into a cozy and stylish sanctuary with a few simple DIY projects. One way to add a touch of softness and personality is by upholstering a headboard yourself. Choose a fabric that complements your existing decor and create a headboard that is both comfortable and visually appealing.
Another option for a quick and easy bedroom makeover is to use peel-and-stick wallpaper. This temporary solution allows you to experiment with different patterns and colors without the commitment of traditional wallpaper. Opt for a floral or pastel print to infuse your bedroom with a springtime vibe. The peel-and-stick wallpaper can be applied to an accent wall, the back of a bookshelf, or even the headboard itself. With its easy application and removal, you can update your bedroom decor as often as you like.
These simple yet impactful DIY projects will instantly refresh your bedroom and create a space that you’ll love to relax and unwind in.
Final Thoughts: Ready to Tackle Your Spring Home Projects?
How to refresh your home for spring doesn’t have to involve major renovations or big budgets. These spring home projects on a budget offer simple ways to infuse your home with color, light, and joy. From the front porch to your cozy bedroom, these seasonal crafts for spring are sure to inspire.
🌸 Free Download: Grab our Spring DIY Project Checklist to plan and track your seasonal refresh!
Share Your Spring DIY Journey!
Which project are you tackling first? Share your progress, tips, or photos in the comments—we’d love to see how you’re making your home bloom!